

Elidinis’ Warden Best in Slot Gear & Strategy Guide
Best Gear vs Elidinis’ Warden
auto-updated from live wiki dataYour stats
Defaults to a maxed (99s) main-game account. Edit any stat to match yours.
Best Ranged setup vs Elidinis’ Warden
Suggested items
Damage / sec
—
vs Elidinis’ Warden
Max hit—
Accuracy—
Time to kill—
Setup value
—
Build options — pick your budget
Open in the DPS calculator →
Best in slot gear for Elidinis’ Warden (current meta)
This setup is computed live from the same wiki-sourced combat stats and monster data that power our OSRS DPS calculator — so it tracks the current meta instead of going stale. Pick your combat style above and it ranks every viable weapon and armour piece by damage per second against Elidinis’ Warden, factoring in the boss's defences, size and any elemental weakness.
Not at maxed stats? Lower any level on the left and the recommendation re-ranks instantly — requirement-gated gear drops out automatically. For the full ranked list per slot, open the BiS calculator; to pit two specific items against each other, use Gear Compare.
Elidinis’ Warden Strategy Guide
The Wardens (ToA) Guide
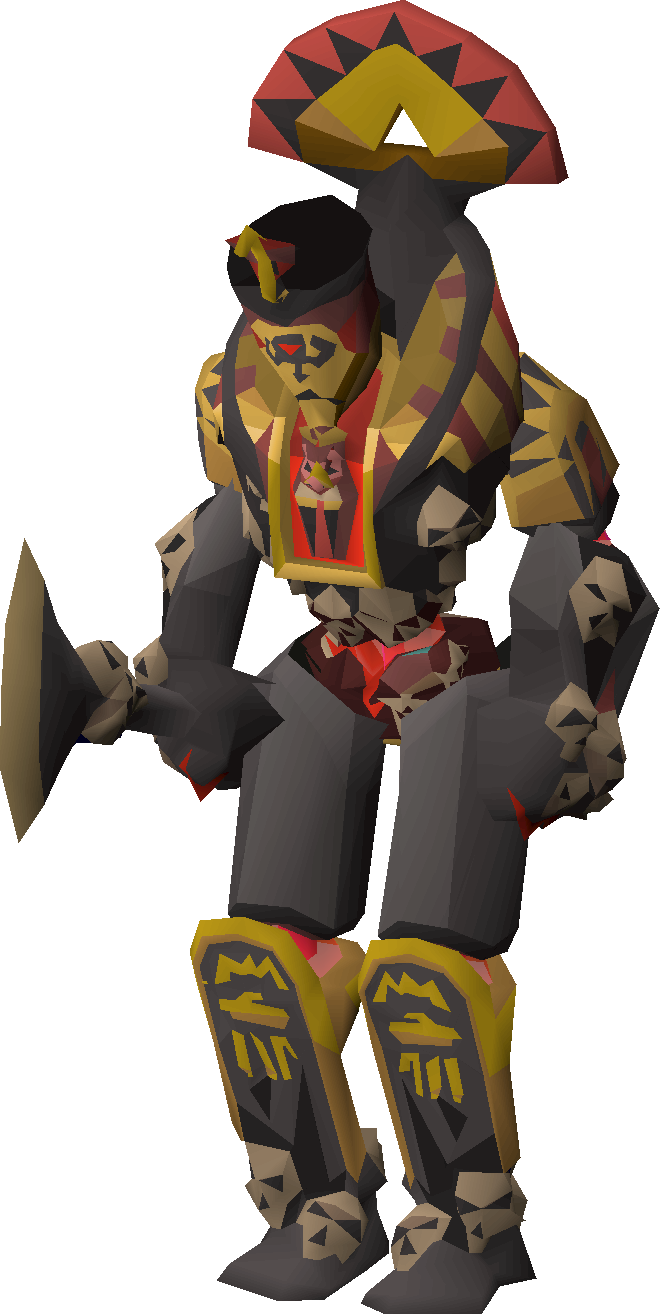
The Wardens are the final encounter of the Tombs of Amascut raid (ToA), in the Jaltevas Pyramid in the Kharidian Desert. The fight is against two ancient automatons — Elidinis' Warden and Tumeken's Warden — but you do not fight both at once: across the encounter you destroy one and battle the other, choosing which by how you play the opening phase. The active Warden is combat level 489, rising to 544 in the final phase.
You must have completed the Beneath Cursed Sands quest to enter the raid. The listed base max hits are 20 for the active Warden (level 489) and 26 for the restored Warden (level 544), but there is no single figure to memorise, because ToA uses the invocation system: a higher Raid Level scales every enemy's hitpoints, defence, accuracy and damage, so the same boss can be a gentle learning kill or a brutal test. The meta leans on Magic and Ranged with melee swaps for specific mechanics, so plan your loadout with our Boss Gear Finder above before you go in.
Requirements & where to fight
The Wardens are fought at the bottom level of the Tombs of Amascut, inside the Jaltevas Pyramid at the necropolis in the Kharidian Desert. The entry to the lower level only opens once all four of the raid's paths (themed after Apmeken, Crondis, Het and Scabaras) have been completed. Before the fight starts, every party member must speak to Osmumten.
The hard requirement is the Beneath Cursed Sands quest — you cannot take part in the raid without it. The raid supports 1–8 players, and you can attempt the Wardens solo or in a group. Quick travel to the necropolis is via the Pharaoh's sceptre teleport, or fairy ring code AKP (which needs 62 Agility).
Difficulty scales with Raid Level
ToA does not have a fixed difficulty. Instead you build an invocation list, which sets a Raid Level. For every 5 raid levels, an enemy's hitpoints, defence, accuracy and damage increase by 2% additively, with damage capping at +150%. A raid level of 100 modifies those stats by +40%; a raid level of 500 raises hitpoints, defence and accuracy by +200% and damage by +150%.
The three bands are Entry Mode (raid level 0–149), Normal Mode (150–299) and Expert Mode (300–600). Higher levels also increase your overall drops and unique chances, so most players push the level as high as they can reliably survive. Treat any raw stat number as a base value that grows with your chosen level.
Recommended stats & gear
The Wardens reward a switch-heavy endgame setup rather than one weapon. Across the fight you need a strong Magic option, a strong Ranged option, and a fast, hard-hitting melee weapon for two specific jobs (the ejected core in phase 2 and the Energy Siphons in phase 3).
Both Wardens are weak to Magic, and as of the June 2025 combat update each has a 50% elemental weakness to earth spells, so a high-accuracy magic weapon shines in the active phase. Ranged is the answer when the active Warden prays against your magic. For the core and the siphons you want the strongest, fastest melee weapon you can bring, since melee always lands its max hit on the core. Rather than chase an exact best-in-slot list, build your loadout for this boss with our magic gear and ranged gear picks and the Boss Gear Finder above — it accounts for what you actually own.
Inventory & supplies
ToA replaces normal food: you cannot eat food inside the raid, but potions that restore health (such as Saradomin brews) still work, alongside the raid's own consumables. The raid hands out supply bundles — ambrosia (which heals 20 Hitpoints and restores prayer like a dose of prayer potion), nectar, tears of Elidinis, smelling salts, and liquid adrenaline — via a Supplies Bag you withdraw from.
Practical loadout for the Wardens: Saradomin brews and a Super combat (or divine) potion for survivability and melee output, prayer restoration, and your combat switches. If you are using special attacks, drink a dose of liquid adrenaline before the fight (it temporarily halves special-attack energy cost) and reapply any salt beforehand. Keep ambrosia in reserve for the dangerous final phase.
Phase 1 — the obelisk & energy troughs
The fight opens with the obelisk emitting orbs that flow down energy troughs to charge both Wardens. You disrupt the charge by attacking the obelisk, and you block orbs by standing on a side of the troughs — but each orb you absorb deals 3 damage. Blocking one side desynchronises the Wardens' charged attacks, which is far easier than dealing with both going off together.
Crucially, this is where you pick your opponent: the Warden whose energy you disrupt most is destroyed, and the other powers up for phase 2. To power up Elidinis' Warden you stand on the east trough. While charging, a Warden fires either a Charged Shot (a slow ball of energy — Elidinis' warning is blue, Tumeken's orange) or spreads floating pyramids (UFOs) that discharge damaging light. The obelisk's defence can be drained to a minimum of 60 (from 100), and it is weakest to magic.
Phase 2 — the active Warden & the core
The Warden you left standing now powers up and fights you directly, attacking with all styles. It always keeps Protect from Melee on plus one more prayer, and this dictates your style: Elidinis' Warden initially prays against ranged, so you must use Magic; Tumeken's Warden initially prays against magic, so you must use Ranged. Tumeken's will chase you down to melee, making Protect from Melee mandatory, while Elidinis' stops a few tiles short.
It reads its attacks: a red skull is the magic attack, a normal skull is the ranged attack; pray accordingly, and note that damage only lands on impact so late reactions still help. It has two specials launched with the magic animation — Divine Projectile (disables overheads and fires a red scimitar/white arrow/blue spell to pray against; used above 55% HP) and Imprisonment (a dark projectile that encases you in stone; used below 55% HP). Attack until the yellow bar fills and the core ejects: damage to the core deals five times the damage to the Warden, and melee always hits its max on it, so swap to a fast melee weapon and burn special attacks here.
Phase 2 hazards — obelisk lightning & skulls
While you fight the active Warden, the obelisk keeps firing a set rotation of area attacks — this is the "lightning" part of the encounter. Converging Beam sends beams north/south then east/west that converge on the obelisk (warning: red lightning round the obelisk) — stand in the opposite quadrant. Windmill Beam sweeps beams clockwise like a windmill (warning: orange lightning) — step off the glowing floor. Lightning Skull launches red skulls that discharge lightning in 7x7 areas (warning: yellow lightning) — stand on the two safe tiles in each cardinal direction from where a skull lands. Keep off the central edge tiles and away from the obelisk to avoid unnecessary beam and zap damage.
Phase 3 — the restored Warden, siphons & enrage
When the core dies, the Warden that fell in phase 1 is restored for the final phase (combat level 544). It drops all protection prayers and combat-style attacks and instead raises and slams the floor for typeless damage: it raises the floors to its right first, then its left, then slams both sides — staying within the three central columns minimises movement, and the attack travels so late reactions work.
At 80%, 60%, 40% and 20% health the Warden stops slamming and spawns Energy Siphons, which are immune to ranged and magic and must be destroyed with melee — reverse them back into the Warden before they detonate a potentially fatal shockwave. During the second and third siphon sets, phantom versions of earlier raid bosses join in (Akkha's and Kephri's phantoms if you face Elidinis' Warden; Zebak's and Ba-Ba's if you face Tumeken's). At 5% HP the Warden enrages, healing for 20% of its max health once; the slams stop, red lightning strikes tiles, and the phantom tears away the back rows of the arena until only a thin strip remains. Hold prayer high, keep ambrosia ready below ~50 HP, and finish it before the floor runs out.
Notable drops
The Wardens themselves only drop the lore book The wardens. The valuable loot comes from Osmumten's sarcophagus and the reward chest after you defeat them — like the Theatre of Blood, the sarcophagus glows purple when a unique is rolled, and only one unique can come from a raid. The marquee uniques are the Masori armour pieces (mask, body, chaps), the Lightbearer, Osmumten's fang, Elidinis' ward, and Tumeken's shadow. Higher raid levels increase your unique chance, and you can track current values for any of these on our GE price tracker.
Common mistakes
Confusing the prayer split. The single most common error is using the wrong style in phase 2: Elidinis' Warden needs Magic, Tumeken's needs Ranged. Get this backwards and you do almost nothing while taking hits.
Trying to range or mage the siphons. Energy Siphons are immune to ranged and magic — have a melee weapon ready for them and for the core.
Letting both Wardens charge in sync in phase 1. Block one trough side to desynchronise their charged attacks; handling both at once is much harder.
Ignoring the obelisk during phase 2. The Converging Beam, Windmill Beam and Lightning Skull each have a coloured warning — learn red/orange/yellow so you move before they fire, not after.
Elidinis' Warden Guide — FAQ
Do I fight both Wardens at the same time?
No. During phase 1 you disrupt the obelisk's energy so that one Warden is destroyed and the other powers up. You fight the powered one in phase 2, then the restored (previously destroyed) one returns for phase 3. You choose which is which by where you stand on the troughs — stand on the east trough to power up Elidinis' Warden.
Which attack style do I use on each Warden?
In the active phase, Elidinis' Warden initially prays against ranged, so you damage it with Magic; Tumeken's Warden initially prays against magic, so you use Ranged. Both keep Protect from Melee up the whole time, and both are weak to magic with a 50% earth-spell weakness. Keep a fast melee weapon for the ejected core and the Energy Siphons.
How does Raid Level change the fight?
The invocation system sets a Raid Level that scales the boss. Every 5 raid levels adds 2% to enemy hitpoints, defence, accuracy and damage (damage caps at +150%). Entry Mode is 0–149, Normal is 150–299, and Expert is 300–600. Higher levels are harder but improve your drops and unique chances, so push the level only as high as you can survive.
What are the best unique drops from the Wardens?
The big rewards come from Osmumten's sarcophagus after the kill, not the Warden's own drop table. The standout uniques are the Masori armour pieces, the Lightbearer, Osmumten's fang, Elidinis' ward and Tumeken's shadow. Only one unique can drop per raid, and your odds rise with Raid Level.
Heading
Possible reasons for this: our item ID is wrong, osrsbox is down or GE Tracker is down. Report this here.

