Giant Mole Best in Slot Gear & Strategy Guide

Giant Mole Strategy Guide

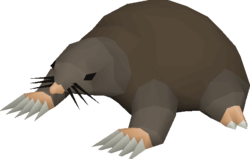
The Giant Mole is a mole boss found in the caves under Falador Park. To access the caves, you must dig on the mounds of Falador Park with a spade, you’ll then be dropped into the caves below. Make sure and bring a light source, preferably a lantern to prevent it from being extinguished by the Mole.

The Giant Mole is possibly one of the easiest bosses in Old School Runescape. Other than chasing the Mole around the caves as it burrows, there aren’t any more advanced mechanics than that.

The main reason players kill the Giant Mole (especially Ironmen) is to gather Mole Skins and Mole Claws, which can be traded to Wyson the gardener in Falador Park for Birdsnests.

Notable Drops
Mole Claw - OSRS item icon
Mole Skin - OSRS item icon

Giant Mole - Dharoks Guide

The fight against the Giant Mole is an easy one – using the Dharoks method you want to use your Dwarven Rock Cake to bring your HP down to 1 to maximize your damage output. You can then use the Protection from Melee Prayer to ensure that you don’t take any damage, and simply chase the Mole around the caves and do as much damage as possible.

If you’re lucky, you may be able to kill the Giant Mole in just a few hits with your Dharoks, if not you may find yourself running around for a couple of minutes while the giant Mole annoyingly digs himself around the caves.

Giant Mole Video Guide

Recommended Setup

Setup Bonuses

Equipment bonuses for this recommended setup.

Attack bonus

Stab: 0 Slash: 0 Crush: 0 Magic: 0 Ranged: 0

Defence bonus

Stab: 0 Slash: 0 Crush: 0 Magic: 0 Ranged: 0

Other bonuses

Melee strength: 0 Ranged strength: 0 Magic damage: 0 Prayer: 0

Inventory

View your recomended inventory below.

Super combat potion(4) - OSRS item icon
Prayer potion(4) - OSRS item icon
Stamina potion(4) - OSRS item icon
Anglerfish - OSRS item icon
Spade - OSRS item icon
Dwarven rock cake - OSRS item icon
Bullseye lantern - OSRS item icon
Teleport to house (tablet) - OSRS item icon

Giant Mole Guide

The Giant Mole is a relatively simple, low-level combat level 230 boss found in the Mole Hole under Falador Park. According to the Wiki she began as a slight accident involving Wyson the gardener and an ultra-growth potion, and today she is one of the most beginner-friendly bosses in the game — she has a single basic melee attack and no special attacks beyond one signature mechanic.

She has 200 Hitpoints, attacks with Crush on a four-tick attack speed, and her melee swipe has a max hit of 21. She is unaggressive, can be fully shut down with Protect from Melee, and can even be safespotted against the cavern walls thanks to her size. Her one quirk — burrowing away to a new part of the lair when she drops to half health — is what gives the fight its character. She is killed for her guaranteed mole skin and mole claw drops (the backbone of the Wyson bird-nest economy), the rare immaculate mole skin, and the Baby mole pet. She can also be taken as a Slayer boss when assigned by Konar, Nieve, or Duradel.

Overview — what, where & why fight her

The Giant Mole lives in the Mole Hole under Falador Park and sits at combat level 230. She is a members' boss released in 2006 and is deliberately uncomplicated — the Wiki describes her as "a relatively simple boss" and "a simple low-level boss." Her examine text is the appropriately groan-worthy "Holy Mole-y!"

Players fight her for a few reasons. First, she is notable for her guaranteed mole skin and mole claw drops, which can be traded to Wyson for unique bird nests — one of the only sources of consistent bird nests, which can be crushed into an ingredient for Saradomin brews. Second, she drops the immaculate mole skin, used to create the gem sack or traded to Wyson for five unique bird nests. Third, she is a popular Slayer boss and an easy source of the Baby mole pet. Finally, killing her once is a hard Falador Diary task, and that diary's reward — the Falador shield 3 — directly improves the fight.

There is no Slayer level or quest requirement to fight her; she is open to any member who can reach the lair and survive a max hit of 21. As a Slayer target she awards 215 Slayer experience per kill, and because she is unaggressive with a single predictable attack, she is one of the gentler boss tasks a mid-level account can take on.

Requirements & where to fight

The Giant Mole is accessed by digging with a spade on top of the mole hills scattered on the west side of Falador Park. The closest teleport the Wiki recommends is the Falador Park option on the ring of wealth. A light source is required to navigate the tunnels — without one you are constantly bitten by bugs and take damage.

There are no skill, Slayer, or quest gates to enter. The Wiki's suggested skills for a comfortable trip are 60+ Attack, 60+ Strength, 60+ Defence, and 60+ Hitpoints (plus 60+ Ranged or Magic if using those styles), and 43+ Prayer for Protect from Melee (44+ for Eagle Eye, 70+ for Piety, 74+ for Rigour).

  • Light source: candles, torches, or oil lamps work, but open sources are extinguished if she retreats within melee range, so a closed bullseye lantern, Kandarin headgear, or Firemaking cape is better. A tinderbox is needed to relight extinguished open sources.
  • Fire of Eternal Light: completing the Making Friends With My Arm quest lets you build a permanent, unextinguishable light source inside the lair, removing the light problem entirely.
  • Falador shield 3 or 4: carrying one in your inventory gives a flashing arrow that tracks the mole after she burrows. The shield is a hard Falador Diary reward, so she must be killed at least once first.
  • Private instance: you can pay 25,000 coins at the spade by the north-western entrance to fight her in an instanced area. This drops to 12,500 after claiming the hard Combat Achievements rewards, and is halved again for ironman accounts.

Recommended stats & gear

The Giant Mole can be killed with all three combat styles, and the right choice depends on your bank. Rather than list exact items here, plug your gear into our Boss Gear Finder above to get the strongest loadout you can actually afford — below is the meta style picture from the Wiki.

  • Ranged is one of the most effective approaches, and is especially recommended when safespotting because the mole has low ranged defence. The Wiki marks the twisted bow as one of the single most effective ways to kill her; the broad item families are a slayer helmet or high-tier ranged head, a strength/accuracy amulet, a top-tier ranged weapon, and a bow-and-crossbow class setup. A dwarf multicannon can be added to speed kills.
  • Magic is comparably strong. Tumeken's shadow is listed as one of the most effective weapons, and because the mole has a 50% elemental weakness to earth spells, earth spells are effective for accounts without a top powered staff who want to safespot. A key bonus of magic: splashes cannot trigger her to burrow, so you chase her far less. Do not bring a cannon when using a powered staff, as its accuracy is poor.
  • Melee works well too. Osmumten's fang offers the most kills per hour among melee options, while Dharok the Wretched's equipment is a much more affordable bracket. When meleeing, the Wiki advises stabbing weapons because she has lower stab defence (60) than slash (80) or crush (100).

For exact weapon, armour, and ring choices across every budget tier, use the Boss Gear Finder rather than copying a fixed list.

Inventory & supplies

Because she hits softly and has no unavoidable damage, your inventory is light and mostly prayer-focused. The exact build varies by style, but the common essentials across the Wiki's recommended setups are:

  • Spade — required to dig into the lair.
  • A good light source such as a lit bullseye lantern, Kandarin headgear, or Firemaking cape (not needed if the Fire of Eternal Light is built).
  • Combat potions for your style — divine ranging potions for ranged, a saturated heart for magic, or divine super combat potions for melee.
  • Prayer potions — roughly 8–15 doses depending on style and gear, the bulk of your inventory.
  • Stamina potions — about 3–4 for the running involved in chasing her.
  • Falador shield 3 or 4 to track her after she burrows.
  • Ring of wealth with charges for teleporting back to Falador Park.
  • Rune pouch filled with the runes your setup needs (nature and fire for high alching/teleports, or earth-spell runes for the magic setup).
  • Dwarf multicannon and steel cannonballs (optional) to speed up kills — but not when autocasting with a powered staff.

If you are running the magic setup, the Wiki's recommended rune pouch carries runes for both earth spells and High alchemy, so you can alch valuable drops between kills rather than banking them. A saturated heart can replace stacks of magic potions for sustained boosts.

A note for poison-capable players: poison does not trigger her to burrow, so a poison weapon dramatically shortens kill times. Ironmen who lack the high-Herblore requirement for Poison(++) potions have a great alternative — complete the Tai Bwo Wannai Trio quest and speak to Tamayu, who rewards a rune spear (kp), a karambwan-poison-coated weapon with the same poison strength as Poison(++).

Fight mechanics — the melee attack

The Giant Mole's only standard attack is a melee claw swipe: she swings a claw at her target, dealing up to 21 damage on a four-tick attack speed using the Crush style. She has no ranged, magic, or special attacks of any kind.

Because of this, the fight is almost entirely about prayer. Protect from Melee negates all of her damage, so with that prayer active and enough prayer potions she cannot meaningfully hurt you. She is also unaggressive and, thanks to her large size, can be safespotted against the various rocks and cavern walls — she will not reposition around a safespot to reach you, which is how low-level players clear her risk-free with ranged or earth spells.

Fight mechanics — burrowing & relocation

This is the mechanic that defines the fight. While she is between 50% and 5% of her health, every attack against her has a 25% chance to make her burrow into the ground and reappear somewhere else in the lair, losing aggression and forcing you to chase her. (Mod Ash confirms this as "1/4 when its health is between 5% and 50%.") A 2016 change means she will no longer dig and flee once she is below 10 Hitpoints, so the final sliver of her health is safe.

Several important details flow from this:

  • The trigger includes attacks that hit a 0 — except a magic attack that splashes, which is why magic setups chase her far less.
  • Poison damage does not cause her to burrow, making poison a fantastic tool for shortening kills.
  • When she burrows there is an additional chance she throws dirt, extinguishing open light sources (candles, torches) of players within melee distance — shown by dirt splatters on screen. Closed sources like the bullseye lantern are unaffected.
  • Without tracking help, hunting her across the whole lair is tedious. A Falador shield 3 or 4 in your inventory shows a flashing arrow to her new location. Thralls will path toward her after she digs, but they are not recommended because their hits can themselves trigger more burrowing.

Strategy / kill rotation

The kill plan is short. Activate Protect from Melee, attack until she dies, and re-find her each time she burrows. Above 50% and below 5% (or below 10 HP) she cannot burrow, so the only chase window is the middle of her health bar.

For low-level players, the cleanest approach is to safespot her against a cavern wall and range her down — she has low ranged defence and won't move to reach you. Ranging or magic from a safespot lets you ignore her melee entirely.

For high-level players, the fastest method on the Wiki is Dharok the Wretched's equipment: lower your health to 1 with the Locator orb or a Dwarven rock cake, keep Protect from Melee on, and flick Piety — at full Dharok's damage she can die in roughly 2–3 hits depending on your strength gear, which often kills her before she ever reaches the burrow window. If you don't own a strength-bonus cape, use a prayer-bonus cape instead so Protect from Melee lasts longer between restores. The Wiki notes Dharok's offers fewer kills per hour than the Armadyl crossbow but is far more affordable for most players, while Osmumten's fang gives the most kills per hour among melee weapons.

Whatever style you bring, a dwarf multicannon can speed things up, and there is a placement trick: by setting your cannon on the marked tile while standing in the western safespot at the centre of the cave, the cannon lands two hits per rotation instead of one, improving your damage output. The exception is magic, where you should leave the cannon at home when autocasting a powered staff because its accuracy is poor. Across all methods, completing the hard Falador Diary is highly recommended, both for the tracking shield and because it notes the guaranteed skin and claw drops so trips last longer.

Notable drops

The Giant Mole's signature drops are her two guaranteed uniques: the mole claw and mole skin (1–3 per kill), which drop noted after the hard Falador Diary and are traded to Wyson for unique bird nests — a rare consistent bird-nest source that feeds Saradomin brew production. Her standout rare unique is the immaculate mole skin, used to build the gem sack or exchanged with Wyson for five bird nests. Her pet, the Baby mole, drops at 1/3000.

Beyond those she also drops big bones every kill, a spread of weapons, runes, and supplies, the rare drop and gem tables, a brimstone key while on a Konar Slayer task, and an elite clue scroll. The full drop table with current Grand Exchange values is shown above.

Common mistakes

  • Bringing an open light source. Candles and torches get extinguished when she throws dirt on burrowing — a lit bullseye lantern (closed) is immune, so use one or build the Fire of Eternal Light.
  • Fighting without burrow-tracking. Without a Falador shield 3 or 4 you waste time hunting her across the whole lair every time she digs at half health.
  • Ignoring poison. Poison never triggers her to burrow, so skipping a poison weapon (or the rune spear (kp) for ironmen) leaves a lot of kill speed on the table.
  • Cannoning with a powered staff. A dwarf multicannon has poor accuracy here; the Wiki says not to bring one when autocasting with a staff like Tumeken's shadow.
  • Using thralls to track her. They path to her after she digs, but their own hits can cause extra burrowing, so they are not recommended as a Falador shield substitute.
  • Forgetting Protect from Melee. It negates all of her damage; leaving it off turns a safe boss into needless chip damage from her max-21 swipe.

Notable Giant Mole drops & rates

Baby mole drop Baby mole 1/3,000 · pet

Drop rates from our drift-checked database; live Grand Exchange values are on the GE Price Tracker.

Giant Mole Guide — FAQ

What level do I need to fight the Giant Mole?

There is no Slayer or quest requirement — any member can fight her. The Wiki's suggested skills for a comfortable trip are around 60+ Attack, Strength, Defence and Hitpoints, plus 43+ Prayer for Protect from Melee. She sits at combat level 230 but only hits a max of 21, so even modest accounts can clear her with the right prayer.

Why does the Giant Mole keep digging away?

While she is between 50% and 5% health, every attack against her has a 25% chance to make her burrow to a new spot in the lair and lose aggression. She stops doing this once she's below 10 HP. Carry a Falador shield 3 or 4 for a flashing arrow that tracks her, and note that poison damage and magic splashes never trigger the burrow.

What is the Giant Mole weak to?

Her lowest melee defence is to stab (60, versus 80 slash and 100 crush), so meleers should use stabbing weapons. She has low ranged defence, which makes ranged strong (especially when safespotting), and a 50% elemental weakness to earth spells for magic users. Top setups on the Wiki include the twisted bow, Tumeken's shadow, and Osmumten's fang.

How do I stop my light from going out?

When the mole burrows she can throw dirt that extinguishes open light sources — candles, torches, oil lamps — of players within melee distance. Use a closed source like the bullseye lantern, which is unaffected, or complete Making Friends With My Arm to build the permanent Fire of Eternal Light inside the lair.

What are the best drops from the Giant Mole?

Her headline drops are the guaranteed mole skin and mole claw, traded to Wyson for rare bird nests, and the immaculate mole skin used for the gem sack. The pet, the Baby mole, drops at 1/3000. She also gives big bones every kill plus access to the rare drop and gem tables, and a brimstone key while on a Konar Slayer task.

Can I fight her in a private instance?

Yes. Pay 25,000 coins at the spade by the north-western entrance for a private instance. The cost drops to 12,500 once you've claimed the hard Combat Achievements rewards, and is halved again for ironman accounts (so 12,500, or 6,250 with the hard CAs done).

Heading

More info failed :(
Possible reasons for this: our item ID is wrong, osrsbox is down or GE Tracker is down. Report this here.
OSRS item details Members Item: Tradeable:
Price: Updated: