Zulrah Best in Slot Gear & Strategy Guide

Zulrah Strategy Guide

AKA - Profit Snek Requirements - Partial completion of Regicide

Zulrah is a popular solo boss found in the east of Zul-andra, often farmed by players due to the quick kills and ease of travel and banking.

The Zulrah fight is often iconically considered to be very difficult to get the hang of, especially without a detailed guide – but the fact is that once the player has learned the ‘rotations’ of Zulrah the fight becomes very easy and Zulrah becomes a very fast and very effective method of farming gold. For every kill, Zulrah has a 100% chance to drop between 100 – 300 [osrsbox name=”Zulrah Scales” id=”12934″], as well as two other drops from the rest of the drop table. The three unique items on the Zulrah drop table – the [osrsbox name=”Tanzanite Fang” id=”12922″], [osrsbox name=”Magic Fang” id=”12932″] and the [osrsbox name=”Serpentine Visage” id=”12927″] – are all dropped at a rate of 1/128 and a are a welcome addition for both regular players and Ironmen alike.

Zulrah cannot be damaged through melee, and the recommended Ranged and Magic levels for the fight are at least 75.

The Zulrah boss fight takes place in an instance meaning you can only fight the boss alone and that your items are retrievable on death at 0 cost.

Notable Drops
Tanzanite fang - OSRS item icon
Magic fang - OSRS item icon
Serpentine visage - OSRS item icon
Uncut Onyx - OSRS item icon

Profit Snek - Basic Void Guide

Void is a fantastic setup to use at Zulrah for players of all levels, as it reduces the amount of gear you need to bring in your inventory and makes it easier to achieve quick gear switches between Zulrah’s rotations. Regular Void will work, but Elite Void is highly recommended.

Within the instance, Zulrah will spawn multiple snakelings with 1hp – which makes the [osrsbox name=”Ring of Suffering” id=”19550″], or at least [osrsbox name=”Ring of Recoil” id=”2550″] absolutely necessary for the entirety of the fight.

Rotations – Learning the rotations is the hardest part of Zulrah. There are a few different websites you can use to help learn – one of them is Zulrah Helper from JosephsPalace.

Profit Snek Video Guide

Recommended Setup

Setup Bonuses

Equipment bonuses for this recommended setup.

Attack bonus

Stab: 0 Slash: 0 Crush: 0 Magic: 0 Ranged: 0

Defence bonus

Stab: 0 Slash: 0 Crush: 0 Magic: 0 Ranged: 0

Other bonuses

Melee strength: 0 Ranged strength: 0 Magic damage: 0 Prayer: 0

Inventory

View your recomended inventory below.

Void ranger helm - OSRS item icon
Ava's assembler - OSRS item icon
Toxic blowpipe (empty) - OSRS item icon
Ranging potion(4) - OSRS item icon
Necklace of anguish - OSRS item icon
Pegasian boots - OSRS item icon
Anglerfish - OSRS item icon
Prayer potion(4) - OSRS item icon
Anglerfish - OSRS item icon
Anti-venom+(4) - OSRS item icon
Anglerfish - OSRS item icon
Zul-andra teleport - OSRS item icon
Teleport to house (tablet) - OSRS item icon

Rune Pouch

Your Rune Pouch should contain:

Astral Rune
Death Rune
Earth Rune

Equipment / Inventory Notes:  

If you want to further increase the speed of your kills you should bring runes for Vengeance in your [osrsbox name=”Rune Pouch” id=”12791″].

An [osrsbox name=”Imbued Heart” id=”20724″] will increase your overall DPS through magic but is not necessary.

Profit Snek - Advanced Hybrid Guide

This Hybrid setup is recommended for players who already have a good amount of experience fighting Zulrah and are comfortable switching many pieces of gear in between phases. This setup will allow for fast kills and more kills per trip than the Void method due to the increase in both Offensive and Defensive stats.

Within the instance, Zulrah will spawn multiple snakelings with 1hp – which makes the [osrsbox name=”Ring of Suffering” id=”19550″], or at least [osrsbox name=”Ring of Recoil” id=”2550″] absolutely necessary for the entirety of the fight.

Rotations – Learning the rotations is the hardest part of Zulrah. There are a few different websites you can use to help learn – one of them is Zulrah Helper from JosephsPalace.

Profit Snek Video Guide

Recommended Setup

Setup Bonuses

Equipment bonuses for this recommended setup.

Attack bonus

Stab: 0 Slash: 0 Crush: 0 Magic: 0 Ranged: 0

Defence bonus

Stab: 0 Slash: 0 Crush: 0 Magic: 0 Ranged: 0

Other bonuses

Melee strength: 0 Ranged strength: 0 Magic damage: 0 Prayer: 0

Inventory

View your recomended inventory below.

Toxic blowpipe (empty) - OSRS item icon
Armadyl chestplate - OSRS item icon
Armadyl chainskirt - OSRS item icon
Necklace of anguish - OSRS item icon
Ava's assembler - OSRS item icon
Armadyl helmet - OSRS item icon
Pegasian boots - OSRS item icon
Bastion potion(4) - OSRS item icon
Barrows gloves - OSRS item icon
Anglerfish - OSRS item icon
Anti-venom+(4) - OSRS item icon
Anglerfish - OSRS item icon
Prayer potion(4) - OSRS item icon
Anglerfish - OSRS item icon
Prayer potion(4) - OSRS item icon
Anglerfish - OSRS item icon
Zul-andra teleport - OSRS item icon
Imbued heart - OSRS item icon
Teleport to house (tablet) - OSRS item icon
Rune pouch - OSRS item icon

Rune Pouch

Your Rune Pouch should contain:

Astral Rune
Death Rune
Earth Rune

Equipment / Inventory Notes:  

If you want to further increase the speed of your kills you should bring runes for Vengeance in your [osrsbox name=”Rune Pouch” id=”12791″].

An [osrsbox name=”Imbued Heart” id=”20724″] will increase your overall DPS through magic but is not necessary.

Profit Snek - Twisted Bow Guide

The power of the [osrsbox name=”Twisted Bow” id=”20997″] allows you to only use Ranged attacks on all three phases of Zulrah, significantly decreasing the amount of effort and difficulty of the fight.

Within the instance, Zulrah will spawn multiple snakelings with 1hp – which makes the [osrsbox name=”Ring of Suffering” id=”19550″], or at least [osrsbox name=”Ring of Recoil” id=”2550″] absolutely necessary for the entirety of the fight.

Rotations – Learning the rotations is the hardest part of Zulrah. There are a few different websites you can use to help learn – one of them is Zulrah Helper from JosephsPalace.

Profit Snek Video Guide

Recommended Setup

Setup Bonuses

Equipment bonuses for this recommended setup.

Attack bonus

Stab: 0 Slash: 0 Crush: 0 Magic: 0 Ranged: 0

Defence bonus

Stab: 0 Slash: 0 Crush: 0 Magic: 0 Ranged: 0

Other bonuses

Melee strength: 0 Ranged strength: 0 Magic damage: 0 Prayer: 0

Inventory

View your recomended inventory below.

Toxic blowpipe (empty) - OSRS item icon
Bastion potion(4) - OSRS item icon
Anti-venom+(4) - OSRS item icon
Prayer potion(4) - OSRS item icon
Anglerfish - OSRS item icon
Prayer potion(4) - OSRS item icon
Anglerfish - OSRS item icon
Zul-andra teleport - OSRS item icon
Teleport to house (tablet) - OSRS item icon
Rune pouch - OSRS item icon

Rune Pouch

Your Rune Pouch should contain:

Astral Rune
Death Rune
Earth Rune

Equipment / Inventory Notes:  

If you want to further increase the speed of your kills you should bring runes for Vengeance in your [osrsbox name=”Rune Pouch” id=”12791″].

An [osrsbox name=”Imbued Heart” id=”20724″] will increase your overall DPS through magic but is not necessary.

Zulrah Boss Guide: Rotations, Prayers, Gear & Drops

Overview

Zulrah is a level 725 solo-only snake boss found at a shrine east of Zul-Andra, reached by boat. It is one of OSRS's signature "learn the patterns" bosses: Zulrah has 500 Hitpoints and continually dives into the swamp, re-emerging as a different coloured form that changes both how it attacks and what it is weak to. Master the rotations and Zulrah becomes a fast, repeatable money maker; rush in blind and its venom, snakelings and 41-damage hits will combo you in seconds.

Zulrah switches between three forms throughout the fight, distinguishable by colour. Each form has its own attack style, its own weakness, and its own correct overhead prayer. The whole guide below is built around reading the colour and reacting correctly. Because Zulrah's attacks are very accurate, getting the prayer and weakness map wrong is the single biggest cause of failed trips.

Killing Zulrah is a required task for the hard Western Provinces Achievement Diary, which in turn is a requirement for upgrading to the Elite Void Knight equipment set, so even players who don't want it as a money maker often kill it at least once.

Requirements

Before you can fight Zulrah you must have completed the quest Regicide to the point of reaching Port Tyras, and you must have spoken with High Priestess Zul-Harcinqa to offer yourself as the sacrifice in place of the gnome child. Until you do this, Priestess Zul-Gwenwynig will prevent you from boarding the boat to the shrine.

There is no minimum combat level gate beyond that quest access, but the Wiki's recommended skill levels are a sensible benchmark for a safe, profitable trip:

  • 75+ Magic if using Magic
  • 80+ Ranged if using Ranged
  • 70+ Defence
  • 80+ Hitpoints
  • 45+ Prayer for Eagle Eye, Mystic Might, and the protection prayers
  • 82+ Construction (only if you want to boost for an Ornate rejuvenation pool in your house)

Getting there: a Zul-andra teleport scroll drops you next to the dock and is about 20 seconds faster than the fairy ring. The fairy ring code BJS takes you to the stepping stone, which requires level 76 Agility to cross (can be boosted, 71 with a summer pie). A charter ship to Tyras Camp is the budget option. Because trips are short and the boss hits hard, having a quick source of healing nearby helps you chain kills: an Ornate rejuvenation pool in your player-owned house cures venom and restores prayer and hitpoints, and the Pool of Refreshment in the Ferox Enclave is reachable with a Ring of dueling.

Recommended stats & gear

The best Zulrah setup uses both Ranged and Magic to exploit the boss's form-specific weaknesses, switching styles to match whichever colour is up. That is the core principle; the exact items depend on your bank, so use our Boss Gear Finder for a loadout tuned to what you own rather than copying a fixed list.

A few principles that hold regardless of budget:

  • Bring both styles. Magic punishes the green and crimson forms; Ranged punishes the tanzanite (blue) form. Dual-style is what makes Zulrah fast. Beginners can bring fewer switches until comfortable with the phases.
  • Exploit the fire weakness. Zulrah has a 50% elemental weakness to fire, so fire spells are 50% more accurate and deal 50% more damage to it. This makes fire spells especially strong for lower-levelled players or anyone using the Harmonised nightmare staff; powered staves do not get this bonus.
  • Handle venom. A Serpentine helm grants immunity to venom and frees up an inventory slot, at the cost of negative Magic and Ranged bonuses and needing to be charged with Zulrah's scales. It is recommended for beginners until you can kill Zulrah consistently; experienced players often skip it and rely on anti-venom+ instead.
  • Bring a recoil source. A Ring of recoil or Ring of suffering (r/ri) is highly recommended to kill the snakelings cheaply.

For style-specific kits see our magic gear and ranged gear pages, or browse the full best-in-slot gear hub.

Inventory & supplies

Zulrah's danger comes from sustained accurate damage plus venom, so your inventory is built around healing fast and never letting venom run. A standard dual-style trip carries:

  • An anti-venom source. At least one Extended anti-venom+ (or wear a Serpentine helm). Note that standard antipoison only reduces venom to regular poison – it does not stop it. Venom starts at 6 damage per hit and increases up to 20 the longer it is left untreated, so do not ignore it.
  • Food, with Cooked karambwan for combo-eating. The recommended loadouts bring Sharks (or better) as the bulk of healing, plus 4+ Cooked karambwan so you can eat two pieces of food in one tick when low on Hitpoints.
  • A damage-boosting potion for your main style – for example a Divine ranging potion or Bastion potion for Ranged, or a Saturated heart / Magic potion / Forgotten brew for Magic.
  • 1–3 Prayer potions or Super restores to keep protection prayers running.
  • A Ring of dueling for a Ferox Enclave teleport to restore drained stats after a kill (a Construction cape or Teleport to house tab works if you use an Ornate rejuvenation pool).
  • Zul-andra teleport scrolls (or a Quest point cape for a close fairy-ring teleport if you have 76 Agility for the Zul-andra shortcut).
  • The book of the dead and a rune pouch with Fire, Blood and Cosmic runes to cast resurrection spells if your build supports it.

This is a representative kit, not a fixed shopping list – exact items scale with your gear. For current item prices while you stock up, use our GE price tracker.

Fight mechanics

Zulrah has a Defence, Magic and Ranged level of 300, plus a small accuracy and strength bonus on every form. It has no melee defence on any form, but it swims in the water around the U-shaped island and can only be reached by a halberd-type weapon – everything else has to be Ranged or Magic. It attacks at speed 3, and is aggressive and poisonous (venom).

One quirk that catches everyone out: damage to Zulrah is capped at 50. Any hit that would deal more than 50 is randomly reduced to between 45 and 50 instead. (The Twisted bow is still worth using, because dealing over 50 more often means more hits land in that 45–50 band.) Another: damage is calculated when an attack is generated, not when the projectile lands. That means if Zulrah dies just as it launches an attack, that attack can still deal damage and even kill you – keep your health and the correct overhead prayer up until the loot actually drops.

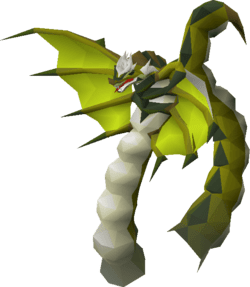
Green (serpentine) form – Ranged attacker, weak to Magic

When Zulrah is green it attacks with Ranged. Pray Protect from Missiles. It is weak to Magic in this form – it has −45 magic defence and +50 ranged defence, so this is where your magic switch does the most work. Its max hit is 41.

Tanzanite (blue) form – Magic + Ranged attacker, weak to Ranged

The tanzanite form (the main page calls it "blue") randomly attacks with both Magic and Ranged, but uses Magic much more frequently, so the recommended overhead is Protect from Magic. It is weak to Ranged in this form – +300 magic defence and +0 ranged defence – so range it down. Its max hit is 41. Note Zulrah can fire Ranged up to five times in succession here.

Crimson (magma/red) form – typeless melee swipe, weak to Magic

When Zulrah is red it uses a typeless attack: it stares at the player's position for several seconds, then whips its tail at that spot. Avoid it by moving two tiles away from the targeted area before it strikes. If it connects you take 20–30 damage and are stunned for several seconds – there is no overhead prayer that blocks it, only movement. This form is more resistant to damage than the other two (+300 ranged defence, +0 magic defence), so Magic is typically more effective than Ranged here. Its max hit is 30.

Snakelings

In any form, Zulrah can summon snakelings by shooting white orbs. Each snakeling attacks with either magic or melee (never both). They are combat level 90 but have only 1 Hitpoint, so they die in one hit – the catch is they are extremely accurate and can hit up to 15. Protection prayers block their attacks, but if Zulrah is also attacking it is usually better to tank the snakelings and pray against Zulrah, since it hits harder. This is why a Ring of recoil or Ring of suffering is so strongly recommended: it kills snakelings for you. If Zulrah throws a white orb just before diving, the snakeling only appears after Zulrah resurfaces. Snakelings die off on their own after lingering more than 40 seconds, and all die when Zulrah is killed.

Venom clouds

Zulrah also spawns venom clouds via a barrage of dark-green orbs. Standing in a cloud's 3x3 area deals damage every tick, which adds up fast, so position yourself out of them each phase. Sometimes a phase forces you to run through a cloud to re-position – take the cloud damage rather than eat a full unprepared Zulrah attack. Importantly, venom clouds deal venom damage but do not envenom you, unlike Zulrah's and the snakelings' direct attacks, which envenom even through a protection prayer unless they miss.

Strategy

Zulrah's forms, and when and where it spawns snakelings and venom clouds, are predictable. At the start of a fight Zulrah enters one of four possible rotations, each a fixed sequence of phases. A full rotation takes about three minutes. After it finishes one rotation it begins another (possibly the same one), and rotations after the first can randomly deviate from the expected phase, including an unpredictable form that switches between magic and ranged in a way you cannot pray against. Because of this, the goal is to kill Zulrah within the first rotation.

At the very start Zulrah is always green in the middle of the shrine and never attacks immediately – it fills the area with venom clouds (leaving the east and west tips clear) and then dives. Since you are not in combat until the second phase, you can hop worlds to re-roll the rotation if you want to practise a specific one. The Wiki notes Rotation 3 is often best for learning, because rotations 1 and 2 stay ambiguous for longer and rotation 4 tends to deal more damage.

You identify the rotation by Zulrah's second phase: if the second phase is crimson, it is rotation 1 or 2; if the second phase is green, it is rotation 3; if the second phase is tanzanite, it is rotation 4.

General prayer discipline. When learning, always run Protect from Missiles in the green form and Protect from Magic in the tanzanite form – the attacks are very accurate and hit hard. A protection prayer only needs to be active starting on the same tick Zulrah begins its attack animation, so you can switch the moment the projectile is fired.

The "Jad" phase. Near the end of each rotation Zulrah enters a green phase, nicknamed the "Jad" phase, where it alternates between Ranged and Magic on every single attack. You must flick your overhead each attack to match: as soon as a green ranged projectile fires, switch to Protect from Magic; as soon as a magic projectile fires, switch back to Protect from Missiles. Beginners are advised to stop attacking and just focus on praying correctly through this phase. Which style it leads with depends on the rotation – in rotations 1 and 2 it starts with ranged, while in rotations 3 and 4 it starts with magic – so confirm the rotation before committing to a flick pattern.

The crimson swipe. Whenever the red form appears, pre-empt it: step two tiles off your current spot so the tail swipe misses. There are dedicated safespots beside the pillars to evade the melee form. Don't waste the window – use the time it stares to reposition and to clean up any lingering snakelings.

If you want to brush up the underlying combat skills that carry the fight, our Ranged, Magic and Prayer guides cover the prayers and DPS levels referenced above.

Notable drops & rates

On every kill Zulrah always drops 100–299 Zulrah's scales, which are used to charge the serpentine helm and other serpentine equipment. Beyond that, the headline rewards are the unique table and the collectibles:

  • Tanzanite fang – 1/1024 per roll
  • Magic fang – 1/1024 per roll
  • Serpentine visage – 1/1024 per roll
  • Uncut onyx – 1/1024 per roll
  • Jar of swamp – 1/3000
  • Pet snakeling – 1/4000

Zulrah gives two rolls on its drop table per kill (tertiary items such as the jar and pet get only one roll), so a listed per-roll rate of 1/1024 is hit more often than once per 1024 kills in practice. The serpentine visage is used to make the serpentine helm, which is then charged with the Zulrah's scales the boss drops on every kill – the boss effectively supplies its own consumable, which is a big part of why Zulrah is such a popular grind. For live prices on any of these, check the GE price tracker.

Common mistakes

Ranging the red form. The crimson form has +300 ranged defence and +0 magic defence, so continuing to range it wastes the phase – Magic is the answer there. Switch styles to match the colour, every time.

Ignoring venom. Venom climbs from 6 up to 20 damage per hit the longer it runs, and standard antipoison only knocks it down to regular poison. Cure it with anti-venom+ or wear a serpentine helm; don't let it tick while you're also tanking attacks.

Letting attacks land after the kill. Because Zulrah's damage is generated when it launches, an attack fired just before it dies can still hit – and even kill – you. Keep your overhead and HP up until the loot drops.

Praying instead of moving in the red phase. The crimson tail swipe is typeless; no overhead prayer blocks it. The only counter is stepping two tiles away from the targeted spot.

Standing in venom clouds. The 3x3 clouds deal damage every tick and stack up fast. Learn each phase's safe position so you only cross a cloud when a re-position genuinely forces it.

Mis-flicking the Jad phase. This green phase alternates Ranged and Magic on every attack and is the most punishing part of the fight. If you're not confident, stop attacking and just flick the correct overhead each tick – survival beats a few extra hits.

Notable Zulrah drops & rates

Tanzanite fang drop Tanzanite fang 1/1,024 · unique
Magic fang drop Magic fang 1/1,024 · unique
Serpentine visage drop Serpentine visage 1/1,024 · unique
Uncut onyx drop Uncut onyx 1/1,024 · rare
Jar of swamp drop Jar of swamp 1/3,000 · tertiary
Pet snakeling drop Pet snakeling 1/4,000 · pet

Drop rates from our drift-checked database; live Grand Exchange values are on the GE Price Tracker.

Zulrah Guide — FAQ

What do I need to start killing Zulrah?

You must have completed the quest Regicide to the point of reaching Port Tyras, and have spoken with High Priestess Zul-Harcinqa to offer yourself as the sacrifice in place of the gnome child. Until then the priestess won't let you board the boat. The Wiki's recommended levels are 75+ Magic and/or 80+ Ranged, 70+ Defence, 80+ Hitpoints, and 45+ Prayer.

How do I know which form to pray against?

Read the colour. Green attacks with Ranged, so use Protect from Missiles. The tanzanite (blue) form attacks mostly with Magic, so use Protect from Magic. The red (crimson) form uses a typeless tail swipe that no prayer blocks – you avoid it by moving two tiles away instead.

What is Zulrah weak to?

It depends on the form. The green form is weak to Magic (−45 magic defence). The tanzanite (blue) form is weak to Ranged (+0 ranged defence, +300 magic defence). The red crimson form is also weak to Magic. On top of that, Zulrah has a 50% weakness to fire spells across the fight, making them 50% more accurate and damaging.

Why am I still taking poison damage after using antipoison?

Zulrah inflicts venom, an enhanced poison that increases from 6 up to 20 damage per hit the longer it lasts. Standard poison protection only reduces venom to regular poison – it does not grant immunity. Use anti-venom, anti-venom+, extended anti-venom+, or wear a serpentine helm to actually stop it.

What are the snakelings and how do I deal with them?

Snakelings are small versions of Zulrah it summons with white orbs. They are combat level 90 but have just 1 Hitpoint, so a single hit kills them – but they're very accurate and can hit up to 15. The Wiki strongly recommends bringing a Ring of recoil or Ring of suffering (r/ri) so they kill themselves attacking you, especially while you're praying against Zulrah.

Can I melee Zulrah?

Mostly no. Zulrah swims in the water around the island and can only be reached by a halberd-type weapon; it has no melee defence on any form, but every other melee weapon is out of range. The intended approach is dual Ranged and Magic, switching to match each form's weakness.

Why did my hit only do 50 even with a Twisted bow?

Damage dealt to Zulrah is capped at 50; any hit that would exceed 50 is randomly reduced to between 45 and 50. High-damage weapons like the Twisted bow are still worth using, because exceeding 50 more often means more of your hits land in that 45–50 band, raising your average damage.

What are the best drops from Zulrah?

The unique table holds the Tanzanite fang, Magic fang and Serpentine visage (each 1/1024 per roll), plus an Uncut onyx at the same rate. The collectibles are the Jar of swamp at 1/3000 and the Pet snakeling at 1/4000. Every kill also always drops 100–299 Zulrah's scales, which charge the serpentine helm.

Heading

More info failed :(
Possible reasons for this: our item ID is wrong, osrsbox is down or GE Tracker is down. Report this here.
OSRS item details Members Item: Tradeable:
Price: Updated: