

Guides written by Kittyyyy, owner of Nexus
Table of Contents:
- Introduction
- Recommended Quests
- How to Get There
- Recommended Levels
- Recommended Minimum Gear
- How to Form a Team
- Team Size and Scaling
- Roles
- Prepotting
Introduction :
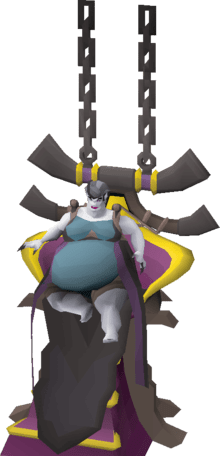
The Theatre of Blood – also known as Raids 2 – is Old School Runescape’s second raid which can be found within the castle of Ver Sinhaza, to the east of Meiyerditch.
The Theatre of Blood, along with the Chambers of Xeric is considered by many to be one of the best pieces of content in the game to be undertaken by a group of players, like a clan or a group of friends. The raid is linear, meaning the same bosses are always fought in the same order. Some of the bosses are extremely challenging and the potential for massive rewards upon completion of the raid like the legendary [osrsbox name=”Scythe of Vitur” id=”22486″ type=”bonuses”] can make it very exciting. It does however have quite a steep learning curve and in order to do raids 2 efficiently, it’s very beneficial to have enough GP to buy lots of high-level gear.
There are different tactics players can use to gear up for Raids 2, one of the most common and easiest ways to efficiently gear is to use Void or Elite Void armour. Using Void allows you to bring less gear and more food and potions, making it ideal for beginners and for players who do not have a lot of GP for expensive gear.
More advanced players or players with a lot of GP may want to bring high-level gear like Bandos for Melee or Ancestral for Magic. These will reduce the amount of inventory space you have for other potions though, so know your limits!
A great resource for players looking to learn to raid as part of a group is the Nexus discord, where there are regular Raids 2 runs for players of all levels – including absolute beginners with no experience!
Recommended Quests :
- A Taste of Hope – Drakan’s Medallion (ToB Teleport)
- Desert Treasure – Ancient Magicks
- Lunar Diplomacy – Lunar Spells
How to Get There :
- Quick-Route : Drakan’s Medallion Teleport
- Slower Route : Ectophial -> Boat to the north (10k gp) -> run south
Recommended Levels :
- 90+
- 90+
- 90+
- 99 (94 minimum)
- 90+
- 90+
- 77+ with
Recommended Minimum Gear
How to Form a Team :
The first time you enter the theatre, you must talk to the mysterious stranger (in the blue circle).
Next, go to the Recruiting Board to the southwest and
- Click “Make Party” or
- Apply to someone’s party by clicking their name first, and then clicking “apply.”
Team Size and Scaling :
Boss health in ToB scales to the number of people in the party. An example health is given as a reference.
- 5 man 100% health (2000)
- 4 man 87.5% health (1750)
- 3 man 75% health (1500)
- 2 man 75% health (1500)
- Solo 75% health (1500)
Here is an expected profit ratio for team size:
- 5 man = 1.00
- 4 man = 1.18
- 3 man = 1.39
- 2 man = 1.45
- Solo = 1.20 (this does not account for costs)
Roles :
- 5 man
- 4 man
- 3 man
Brings freezes in their rune pouch.
Brings vengeance in their rune pouch.
Brings freezes or vengeance in their rune pouch (5man is veng only)
Prepotting :
Once your team is ready, and just before going in, remember to “pre-pot.” Here are two combinations, but there are many. Just remember to boost your .
Basic pre-pot:
No-heart full divine pre-pot:
Click below for full detail ToB Boss Guides
- The Maiden of Sugadinti
- The Pestilent Bloat
- Nylocas Vasilias
- Sotetseg
- Xarpus
- Verzik Phase 1
- Verzik Phase 2
- Verzik Phase 3
Mechanics (Waves) :
(first time? check out the quick video guide below!)
Pre-Verzik :
- When the team enters the final room, they should drop restores and saradomin brews on the ground until they are left with 2 and 3 .
- Note: Potions should not be stacked on top of each other, nor should they be on any marked tile, as this can hurt your team.
- Note: Ironmen may choose to put their potions on the purple carpet and let others know they are “ironman potions.”
Mechanics :
Phase 1
- Verzik will launch a magic attack at players. Those standing behind pillars will be protected, instead causing the pillar to take damage. If you are not standing behind the pillar you will take magic damage (up to MAX hp off-prayer). Pillars that reach 0% health will fall and deal heavy damage to any player standing next to them, stunning them temporarily.
- Verzik takes minimal damage from any weapon other than the Dawnbringer .
- When Verzik reaches 0% health she will collapse the pillars in the room.
(Intermediate) Team Fight Strategy :
- Team roles : 3+ dps (scythe/whip)
- Prayers – , (optional)
- Required items : Dawnbringer
General Strategy (Boss ) :
- The objective of this phase is to use the very powerful Dawnbringer Staff to take down Verzik’s health. This staff is passed between players in orb order. If players are not hitting Verzik with the dawnbringer, they should be meleeing her or standing behind a pillar.
- With the party leader equipping the dawnbringer , the team should stand on the red tile in front of Verzik and to the left, protecting from magic and spam clicking her.
- The party leader should begin the fight by talking to Verzik. The following chart shows each player’s number of attacks when the fight begins, up until the team runs to the pillar (represented by the dark grey squares). From this point on, players should only drop the Dawnbringer behind the pillar.
- Note: Players should be extremely careful never to left-click the Dawnbringer when running back to the pillars. Always right-click the red safespot tile to prevent left-clicking .
- You are safe to attack twice when leaving the pillar. For information on timing, see the video below.
- The maximum number of safe attacks after first going behind the pillar is [Spec 2x] or [Whip/Scythe 2x]
- The team must also monitor the health of the pillars. If the pillar is very low health and you think it may go down, stay safe behind it until Verzik claps and then run to the next pillar in this order:
- When Verzik reaches 0% health, spam-click off of the pillars to avoid their falling damage. The white tiles in the room represent spots that are safe from Verzik’s attack and pillar damage.
Tips :
- Always follow orb order and communicate with your team about who is next to pick up the staff, as well as when it is being dropped. If the order is confused, players should communicate if they have special attack (35% required).
- To increase the chance of living throughout Phase 1, default to standing behind the pillar. Your whip/scythe will do litle damage in comparison to the Dawnbringer. Remember that the special attacks are what kills her, and your objective is simply to kill her with and live. So, keep your health high, protect from magic, and watch the pillar health, remembering to spam-click off if her attack is going to kill it. Watch Verzik’s health when it gets low, and communicate this to your team. You want to be prepared for when it reaches 0% so that you can step off of the pillars.
- The Dawnbringer’s auto-attack is more dps than a whip, and should be used in place of a whip if nobody on the team has 35% special attack energy.
- The Dawnbringer’s damage is not modified by wearing magic gear or using prayers. Players may wear any gear they wish whilst speccing.
- Blood barrage () or a Sanguinesti Staff can be used on Verzik to heal and avoid using brews.
- Players may choose to “(lazy) flick piety” for added damage, whilst still saving the majority of prayer.
Guide-guide :
Verzik Phase 1 DPS calcs :
(first time? check out the quick video guide below!)
Green tiles : Safe tiles.
Blue tile : Verzik’s Shadow.
Mechanics :
Phase 2
Part : (100% – 35% health)
- Verzik will occupy a 5×5 area in the middle of the room (inside the green tiles).
- Verzik will bounce any player who stands next to her on her “dangerous tick” (explained later in ). This attack deals up to 40 damage and stuns the player temporarily. The 3×3 area underneath Verzik will bounce the player up to 80 damage.
- Verzik launches bombs at all players every 4 ticks. These bombs deal range damage (up to 50) which can be reduced by 1/2 with .
- If players are too far from Verzik she can launch her bombs quickly or slowly as well as their regular speed.
- Every 5 auto attacks (bounces do not count), Verzik launches a lightning attack at players. This attack deals light damage (3-7) as it bounces from one player to another.
- If the lightning passes through Verzik, the attack is canceled and the lightning ball stops bouncing.
- If the lightning does not pass through Verzik and instead continues to bounce to players four times or to a player who is far away from Verzik, it will deal 48-50 damage to the last player and stop bouncing.
- Occasionally, Verzik will spawn a number of “crabs” (nylocas) in the room. These will be the same big crabs from the Nylocas room () as well as a new crab ().
- Exploding nylocas – These crabs will target random players and explode, dealing damage depending on the players distance to the crab, as well as the party size (up to 54, 63, 75 in scales). Damage can be avoided by being at least 5 tiles from the crab. These nylocas can also be frozen ().
- Purple Nylocas – Verzik will target one random player and spawn a where they are standing, dealing damage if the player does not avoid the initial spawn. This nylocas will heal verzik for 9-11 hp continuously unless poisoned. Note: If left alive, the purple nylocas stops Verzik from spawning more explosive .
Part : (100% – 35% health)
- When Verzik reaches 35% health or below she will stop attacking players and instead spawn two . When these spawn, Verzik will temporarily put up a tornado shield that negates all damage dealt to her and heals her for that amount.
- Red Nylocas – Heals Verzik for its current health after a certain amount of time. Verzik continues to spawn these nylocas every seven attacks until she is at 0% health or the team is dead.
- After 35%, Verzik will no longer spawn explode or .
- Verzik will use magic attacks now. These attacks can be fully protected against, but drain small amounts of prayer regardless of .
-
(Intermediate) Team Fight Strategy :
Team Roles : 3+ dps (scythe/whip)
Part 1 : (100% – 35% health)
- Prayers – ,, (if no divines)
- Freezes (optional) – (Ice Barrage)
Part 2 : (35% – 0% health)
- Prayers – ,, (if no divines)
General Strategy (Boss ):
- Players should be high health at the start of Phase 2. Prepot a + .
- The team should position themselves so Verzik’s lightning attack will pass through her. If they do not stand in positions, the lightning orb will deal one team member heavy damage.
- (3man) : 2 west, 1 east … or … 1 west, 2 east
- (4man) : 2 west, 2 east
- (5man) : 2 west, 2 east, 1 directly south
- Players should only click on Verzik’s shadow to attack her. Clicking any tile but this may result in running through her which is a potential “heavy bounce” (80 max + stun).
- The objective of this phase is to melee Verzik, whilst avoiding her ranged/mage attacks and reacting to the various nylocas she summons.
Part 1 : (100% – 35% health)
- When nylocas appear, check the room and/or your minimap to find where the crabs are located. If no nylocas are targeting you, continue to attack Verzik, making sure to avoid any crabs that come near you. Players may choose to freeze the nylocas away from their teammates or flinch them.
- To freeze, simply equip a trident (for extra accuracy) and cast on the crab. Avoid frozen crabs as they can still explode and deal damage.
- To flinch, position yourself close to the grab and then immediately run away. The crab will stop and you will take 0 damage (if done correctly).
- Players may choose to “pop” (kill) the or leave it alive.
- If is left alive, remember to stay positioned properly so that Verzik’s electric attack travels through her.
- If popping the , the following poison weapons can be used: () , () or ( + ).
Part 2 : (35% – 0% health)
- When s appear, players have enough time for [3 whip hits] or [2 scythe hits] on the red crab before Verzik’s tornado shield goes down. Players should continue to melee their crabs until they cannot max hit the crab. (see max hit charts below)
- Players should prepare to get off Verzik after her 7th attack, just before her tornado shield.
- If you get bounced, go to your prayers and prepare to pray range. Verzik has a chance to launch range attacks during this part of Phase 2, and will halve the damage. If she does not launch a ranged attack, continue to pray magic.
Whip method (see video)
- Starting on the green tiles, when Verzik bounces up, attack her. Immediately click back one tile away from her, diagonally. You will be on the tile next to her when the green ranged attack lands behind you. Because you clicked back immediately, your character will return to the green line just after the bomb lands, avoiding all ranged damage. If you click back too late, your character will be next to Verzik on her dangerous tick and you have a chance to be bounced (40 max + stun).
- Another way to time this is to use game sounds: click Verzik when you hear a high pitched squeek, then click back one tile diagonally away from her.
Scythe method (see video)
- Important: Scythe walking defaults the player next to Verzik for the majority of the time; as such, it is important for newcomers to understand Verzik’s Phase 2 attack cycle before attempting to scythe walk.
- Verzik’s green ranged attacks calculate and deal damage when they explode (). This means players are able to click on the green smoke () that appears after the ranged attack explodes, as the damage has already been done. Using this information, stand next to Verzik and click the green smoke () when you see it. Immediately click on her shadow after clicking on the green smoke.
- The tick you are away from her is her dangerous tick.
- Note: This method will result in 1 scythe attack/tick being skipped every four “cycles”. This creates a 15:16 attack cycle, also known as “4 tick scythe.”
Tips :
- Keep your health above 80/90 at all times.
- If brewing, always move first and then brew, to avoid any ranged attacks.
- When Verzik reaches 35%, or just before, tell your team so they are prepared to get off her.
- If you are bounced, spam-click Verzik and you will be back in a cycle, every time.
- If you are new to Phase 2, walk around for a moment before attacking Verzik once the phase begins. You will avoid the ranged attacks (hopefully) and get a chance to see the timing, and hear the sounds, before attacking.
- If you are using Runelite, tag Verzik using NPC Indicators (in settings). When phase 2 starts, her hitbox will change, this is when you should click her to start p2.
- If you need to grab potions, try and wait until after an electric attack. She will not do another electric attack for a while, so you will not risk bouncing the electric around her.
- An easy time to heal during is when they immediately appear. Spam your brews, or pick up potions if you need them, as Verzik does not attack for a few seconds when she spawns red nylos.
- Always remember to move while attacking if Verzik’s purple shield is down, as she can attack you with range.
Quick Guide
(First time? Check out the quick video guide below!)
(Intermediate) Team Fight Strategy :
Team Roles : 1 tank , 2+ dps (scythe/whip)
- Prayers – ,, (if no divines)
- Freezes (optional) – (Ice Barrage)
- Vengeance (optional)
Mechanics:
Phase 3
- Brew to full if you have not already and attack Verzik as soon as you can. Verzik can now move around the room.
- At the beginning of Phase 3, Verzik will choose a random player and focus on them. This player is the tank . Verzik will focus on the tank throughout the fight. If the tank is out of her melee distance for too long (or stays under her for too long), Verzik will re-aggro onto a new player and the tanking role switches to them.
- If the tank is next to Verzik on her dangerous tick (when she decides her attack), she can melee for high damage (up to 60+).
- Method 1: The tank should stay under Verzik until she attacks, then immediately attack her once and run back underneath her (or away from her). Every time she autos, attack her once and repeat this process.
- Method 2: Stay under Verzik until she attacks, then immediately attack her once. Watch for hitsplats on players and move under verzik (or away) when you see the last hitsplat. Then repeat.
How to Tank:
- Verzik has an attack cycle: [4 auto attacks, 1 special attack].
- She will attack every 7 ticks with magic (blue body) and range (green body) attacks.
- Crabs – These are the same as Phase 2. There is no . Simply flinch or freeze them.
- Webs – Verzik will stand in the center of the room and spawns webs where players stand, as well as a few extra webs. If a player steps on a web, they will stick to the web and be unable to attack or move. If the player is not freed from the web by a teammate fast enough, the web will damage the player heavily.
- See video below for a guide on how to “run webs” (use the orange tiles and run clockwise.)
- If you are not attacking in the middle of the room, immediately run to the outside and begin to walk clockwise, healing yourself or damaging Verzik (tbow/trident) as you walk.
- Yellows – Verzik spawns one yellow protection pool per player. After a few seconds she will launch a yellow orb attack. If players are not standing on a yellow pool, or if there is more than 1 player on a pool, her attack will deal heavy damage (80 max). Run to and stay on these while healing up to MAX HEALTH in preparation for her next special attack!
- Note: Verzik is immune to damage during yellows.
- Green ball – Verzik launches a slow-moving green ball of death at one player. This ball deals damage equal to 75% of the player’s max health when it reaches them (74 damage if you are 99 hp). You should already be at full hp for this. Simply tank it and avoid other players, as this ball can bounce to them, targeting them instead.
- Note: The targeted player receives a chat box message (like Sotetseg’s death ball) warning them that they are targeted.
20% – 0% health
- At 20% health, Verzik spawns purple tornadoes. These tornadoes each target one player and continue to follow them at walking speed until Verzik or the player is dead. If the tornado catches up to a player, it will deal damage equal to 1/2 of the player’s current health. This damage will also heal Verzik and make her stronger (increased combat stats).
- Tornadoes cannot damage any player besides the one it targets.
- Verzik will continue to do her [4 auto attacks, 1 special attack] cycle during tornadoes, but will now attack every 5 ticks, causing the cycle to go faster.
- Players must constantly move during this part of Phase 3. Sip a .
- and / spec Verzik as much as you can.
- Continue to manage Verzik’s regular auto attacks, special attacks, and avoiding getting caught by your purple AT ALL COSTS as you damage Verzik.
- During yellows, players may choose to tank the yellow rather than risk getting caught by their purple. To do this, brew to full and continue to avoid your purple!
- Note: Do NOT start purples just before yellows. Always wait for yellows to finish, then bring her below 20%.
Tips :
- Keep your health above 80/90 at all times.
- Callouts to your teammates are extremely important. Here are some useful examples:
- “There’s a melee crab under Verzik and it’s aggro’d on you!”
- “Webs are starting soon, get to the outside of the room!”
- “I’m going for the northeast yellow, you take the one to the south!”
- “The green ball is on me! Don’t touch me! I have enough hp, i’m okay.”
- “Purples are starting soon, is everybody ready? High hp, claws on, supercombat, stam. Go!”
- As a tank, you can do 1 extra hit after Verzik’s fourth auto attack, before webs, yellows, and the green ball.
- Additionally, when tanking, you may run through Verzik, if you make sure to be under her on her dangerous tick. This way, if she is about to attack, and you cannot walk under or run away, you can run through. As long as you are underneath her when she decides her attack, you will not melee your team.
- If you are uncomfortable attacking during purples, run around the room until your more confident teammates kill her. The most important thing to remember is do NOT get caught by your purple.
- Running diagonally during purples gives you a tile advantage. Swing out diagonally from Verzik and then click her. Your purple will stay behind you, but keep moving.
- Don’t forget to have fun. Deaths and wipes are a part of Runescape. The key to your success is your commitment to it.
Quick Guide
https://www.youtube.com/watch?v=reFLT4ZA76o
How to Tank
Verzik Phase 3 DPS Calcs :


