Kalphite Queen Best in Slot Gear & Strategy Guide

Kalphite Queen Strategy Guide

AKA - KQ

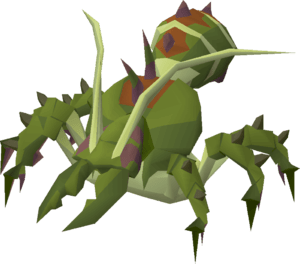
The Kalphite Queen is a Kalphite Boss found within the Kalphite Lair south of Shantay Pass.

As the Kalphite Queen is a Kalphite, she can be successfully killed on a Kalphite slayer task as well as a Kalphite Queen boss task.

The Kalphite Queen was one of the earliest bosses to be added to the game. It was often killed by players who were hunting the famed Dragon Chainbody, however, players nowadays often kill the Kalphite Queen for the chance at the Kalphite Queen Head, which allows you to re-colour the slayer helm to green, and also the Kalphite pet.

One of the easiest ways to kill the Kalphite Queen, especially in groups is to use Veracs. This is due to Verac’s ability to hit through prayer.


Notable Drops
Dragon Chainbody - OSRS item icon
Dragon 2h Sword - OSRS item icon
Jar Of Sand - OSRS item icon

KQ - Veracs Guide

Using Veracs at the Kalphite Queen is fairly simple. You simply need to use the Protection from Magic prayer and kill her as fast as possible.

The Kalphite Queen has two phases, the first phase uses two prayers – Protection from Magic and Protection from Missiles, meaning melee is really the only viable method for this Phase.

During Phase two, the Kalphite Queen uses the Protection from Melee prayer, meaning you would normally switch to Ranged or Magic gear, but as Veracs allows you to hit through prayer you can utilise Veracs for both phases.

You can utilize the ‘step under’ technique in order to take less hits from the Kalphite Queen. What you should do is hit her twice, then immediately run under her so that she is unable to attack you until one of you move. This will give you a couple of seconds to eat if you need to, and then jump out from under her and immediately return to attacking.

KQ Video Guide

Recommended Setup

Setup Bonuses

Equipment bonuses for this recommended setup.

Attack bonus

Stab: 0 Slash: 0 Crush: 0 Magic: 0 Ranged: 0

Defence bonus

Stab: 0 Slash: 0 Crush: 0 Magic: 0 Ranged: 0

Other bonuses

Melee strength: 0 Ranged strength: 0 Magic damage: 0 Prayer: 0

Inventory

View your recomended inventory below.

Dragon warhammer - OSRS item icon
Super combat potion(4) - OSRS item icon
Stamina potion(4) - OSRS item icon
Anglerfish - OSRS item icon
Rune pouch - OSRS item icon
Dramen staff - OSRS item icon
Teleport to house (tablet) - OSRS item icon

Rune Pouch

Your Rune Pouch should contain:

Astral Rune
Death Rune
Earth Rune

Equipment / Inventory Notes:  

Your Rune Pouch should contain Runes for the Vengeance spell, in order to increase your DPS. You can swap out the Dragon Warhammer for a similar Special Attack weapon, like a Bandos Godsword.

Kalphite Queen Guide

The Kalphite Queen (KQ) is the strongest of the Kalphites and one of Old School's classic two-form bosses, found at the bottom of the Kalphite Lair beneath the Kharidian Desert, south-west of the Shantay Pass. She has a combat level of 333 and was historically the strongest monster in the game, succeeding the King Black Dragon. She is a members' boss, needs no quest to fight, and can be handed out as a Kalphite Slayer task by Turael, Spria, Mazchna, Vannaka, Chaeldar, Konar, Nieve, or Duradel.

What makes KQ stand out is her two distinct forms. The grounded first form and the airborne second form each have 255 Hitpoints (510 total across the fight), and each form keeps a different overhead protection prayer active. Her Ranged and Magic attacks always land as successful hits with 100% accuracy, so this is a fight about prayer discipline, positioning, and steady damage rather than dodging incoming shots. She is fought for her unique drops — the dragon 2h sword, dragon chainbody, dragon pickaxe and the kq head — and killing her is a requirement for the Desert Diary (a hard task to kill her once, an elite task to speak to a mounted head in your house). If you want a loadout built for either phase, our Boss Gear Finder above does it for you.

Requirements & where to fight

The Kalphite Queen resides in the Kalphite Lair. From the surface, head west of the Shantay Pass until you find a bulging tunnel; a rope is needed there to enter the dungeon. Inside, work around a fairly large tunnel section past hostile Kalphite soldiers (which can poison if they damage you) to a chamber with two Kalphite guardians and a second bulging tunnel — a second rope drops you to the lower level where the Queen waits, behind another set of guardians. Two ropes are required in total to reach her, and a rope is consumed when entering the dungeon. Completing the Hard Desert Diary makes the ropes permanent once placed, so after that you only set them once.

There is no quest or combat-level requirement to fight her, but she is members-only. Two diary unlocks smooth the trip considerably. The Elite Lumbridge & Draynor Diary lets you use the nearby fairy ring (code BIQ) without carrying a dramen or lunar staff, since the lair sits very close to that ring. The Elite Desert Diary unlocks a crevice shortcut usable at level 86 Agility that connects the lair entrance directly to the boss room — effectively required for long-term farming, especially if you are chasing the Kalphite princess pet. There is a catch: one of the elite diary tasks needs you to speak to a mounted kq head in your player-owned house, which essentially locks the shortcut behind obtaining a kq head first. Players with access to Dorgesh-Kaan can also reach the lair through a tunnel in the Dorgesh-Kaan South Dungeon that emerges near the Kalphite workers. If you still need to get her on task, our Slayer guide covers how Kalphite assignments work.

Recommended stats & gear

The wiki's suggested stats for a comfortable fight are 80+ Hitpoints (93+ if using anglerfish), 75+ Attack, 75+ Strength, 70+ Defence, 75+ Ranged, and 70+ Prayer for Piety (74+ for Rigour). Level 86 Agility is only relevant for the Elite Desert Diary shortcut. You can push these up with our Prayer guide — getting Piety or Rigour online is one of the biggest single jumps in kill speed you can make here.

The defining gear decision is combat style, and it follows directly from KQ's two phases. Because the grounded first form carries elevated Magic and Ranged defence while the airborne second form carries elevated Melee defence, the meta is to bring two combat styles: a strong melee setup for the grounded phase and a strong Ranged setup for the airborne phase. You hit each form where it is softest. It is possible to kill her with a single style — and with a Tumeken's shadow, magic can carry both phases — but the wiki recommends bringing two for an easier, faster fight.

For the melee phase, the meta is high-end stab or crush gear with Piety. For the ranged phase, it is a strong rapid weapon (a blowpipe or twisted bow tier setup) with Rigour. A defence-lowering special weapon — a Dragon warhammer or Elder maul — landed on the first form is important because the drain carries into the second form, making both kills faster. A Ring of suffering (ri) is favoured over a strength or dexterity ring here because the Queen hits you so frequently that its recoil damage adds up across both phases; a Lightbearer is the alternative if you are not resetting your special attack every kill. And if you are on a Kalphite Slayer task, a Slayer helmet (i) provides a far greater DPS boost than any other single item — the wiki is blunt that if you are struggling, you should do Slayer tasks until you get a Kalphite assignment first. Rather than memorise exact best-in-slot pieces, use our Boss Gear Finder above, and see the melee gear and ranged gear pages for the item families that matter at each budget.

Inventory & supplies

A standard high-level KQ inventory carries your second-style switch, restoration potions, a defence-lowering special weapon, and high-healing food. The wiki's recommended supply list for a max-effort trip includes:

  • 1 Divine super combat potion (or a super combat, or separate super attack and super strength) for the melee phase
  • 1 Divine ranging or divine bastion potion for the ranged phase
  • 1-3 Prayer potions or Super restores — more if you are not restoring at a house rejuvenation pool between kills
  • 1 Antidote++ (or a Sanfew serum) for poison — the soldiers and guardians on the way in can poison you, though the Queen herself does not
  • A defence-reducing special weapon such as an Elder maul or Dragon warhammer, with a defender equipped to swing it
  • High-healing food like Anglerfish or Sharks to fill the remaining slots
  • A house teleport tablet for restoring health and specs between kills, or for escaping in a pinch
  • Two ropes (or a Huntsman's kit filled with ropes) to reach the lair if the Hard Desert Diary is not done
  • The Book of the dead and a rune pouch to summon thralls, which meaningfully speed up kills by dealing damage while you wait between attacks

Two slot-saving tips: eat an Anglerfish just before the fight to over-heal your Hitpoints above maximum, and pre-sip an antidote++ before entering the lair rather than carrying it in (unless you wear a serpentine helm for the whole fight, which handles poison for you).

Fight mechanics & the two phases

The entire fight is built around prayer discipline, because two of KQ's three attacks cannot be defended against. Each of her attacks has a max hit of 31. Her Ranged and Magic attacks always land as successful hits — Mod Ash has confirmed 100% accuracy — so Defence bonuses do nothing against them; you can only pray. Her Ranged attack drains 1 prayer point whenever it deals more than 0 damage (reducible with a spectral spirit shield), and it also splashes onto players standing close to her main target. Her Magic attack bounces from player to player. Her Melee attack, by contrast, is a normal accuracy-checked hit, so forcing her into melee actually lowers her damage output: while you stand adjacent to her she has a 1/2 chance to melee and 1/4 each for Ranged and Magic, whereas if you stand away it becomes 1/2 Ranged and 1/2 Magic. This is why staying under her is a damage-reduction tactic, not just a positioning quirk.

First form (grounded). The grounded form has Protect from Magic and Protect from Missiles active at the same time — she was the first monster to display two overhead prayers at once. The critical detail: unlike player protection prayers, these do not grant full immunity. They only give her improved Defence against Magic and Ranged. So you still deal damage through them; melee is simply the most efficient style for this phase because her melee defence is comparatively low here. Pray Protect from Magic (preferred over Protect from Missiles in case another player crashes you, since her magic attack bounces) and run Piety to speed the kill.

Phase transition. When the first form falls to zero health, her chitin cracks open and it takes 20 game ticks (12 seconds) for her to shed her exoskeleton and emerge as the wasp-like airborne form. This window is your reset: heal up, top off prayer, and switch from your melee setup to your ranged setup. Any stat-draining special attacks you landed on the first form — such as a Dragon warhammer's defence reduction — carry over to the second form, so it is worth spending your specs early.

Second form (airborne). The airborne form has Protect from Melee active — once again only as improved Defence, not immunity. This is the phase where a Ranged (or Magic) setup shines, because melee is now her defended style. Walk under her as soon as the phase begins, otherwise she gets a free extra attack on you first. Keep praying Protect from Magic, and run Rigour or Eagle Eye (Augury for magic) to push damage. There is a hard 20-minute time limit on this phase: if you do not finish it in time she reverts to the grounded first form, keeping whatever health the second form had left. Kill that first form again and a fresh, full-health second form emerges — the same reset behaviour as Vet'ion — so a slow ranged setup can genuinely cost you the kill.

Hatching workers. Throughout the fight, if the Queen is near the bulging cocoons, each hit she takes — including hits that deal 0 damage — has a 1/20 chance to hatch an aggressive Kalphite Worker. These despawn after a while. Counterintuitively, experienced players often want them: a crowd of workers around the Queen can pin her so she cannot move to attack, which is the basis of the flinching method below.

Strategy & kill rotation

The standard high-output rotation runs like this. Set up your safespot and aggro before engaging: with around 70% run energy, pull the two Kalphite guardians and then the Queen into a line so the guardians trap her against the central cocoon — with her pinned, you can stand under her and she cannot reach you to attack. Charge in with protection prayers and offensive prayers already on. Land your defence-lowering special (Elder maul or Dragon warhammer) on the first form to soften both phases, then burn it down with melee. The moment it dies, run under her, heal through the 12-second transition, and switch to your Ranged gear for the airborne second form, continuing to pray Protect from Magic the whole time.

In a group, position players on opposite sides of the Queen. Her Ranged attack splashes onto anyone near its main target, so splitting up — combined with Protect from Magic — greatly cuts the damage the team takes over a fight. Solo or grouped, heal whenever you drop below 31 Hitpoints (her max hit) so no single attack can kill you, and step under her while healing rather than eating out in the open where she gets full attacks on you.

A note on the magic option: as of the 25 June 2025 update, KQ gained a 40% elemental weakness to fire spells, which is relevant if you bring a Tumeken's shadow or another fire-spell setup. A lower-resource alternative to fast kills is flinching: trap her against a cocoon (often deliberately spawning workers to block her movement) and attack once every 10 ticks, which is slow enough that she never retaliates. Because her attack speed allows it, you take essentially no damage. Flinching is far slower per kill but uses minimal supplies, so even lower-level players and ironmen can chain trips of five or more kills; summoning thralls makes it much faster. Ironmen have the added edge that their lair is instanced, so leaving and re-entering resets all spawns for a clean setup.

Notable drops

Every kill always gives two items: one from the regular drop table and one from the Consumables table (food or potions like sharks, dark crabs, Saradomin brews, prayer potions or super restores), which is part of why she sustains farming trips. KQ's marquee uniques are what bring most players back: the Dragon 2h sword at a rate of 1/256, the dragon chainbody, the dragon pickaxe, and the kq head. She also drops the Jar of sand at 1/2000 and her pet, the Kalphite princess, at 1/3000. The full drop table, with every tier and exact rate, is shown above this guide — check it before committing to a grind, and use our GE price tracker to value what you pull.

Common mistakes

  • Treating her protection prayers as immunity. They are not — on both forms they only raise her Defence against that style. You still deal damage through them; switching styles is about efficiency, not getting past a wall.
  • Trying to out-defend her Ranged and Magic. Those attacks have 100% accuracy and always hit, so Defence bonuses do nothing against them — you must pray.
  • Not healing above her max hit. She can hit 31, so sitting below 31 Hitpoints risks a one-shot. Top up during the phase transition and whenever you dip low.
  • Standing away from her unnecessarily. Being adjacent forces her into more melee attacks (which can miss), lowering her overall damage; standing off makes every attack a guaranteed-hit Ranged or Magic.
  • Skipping poison protection. The soldiers and guardians on the way in can poison you; bring an antidote++ or wear a serpentine helm. The Queen herself does not poison.
  • Fighting her off-task. A Slayer helmet (i) on a Kalphite task is a bigger DPS gain than any other item — if you are struggling, get her assigned first.
  • Letting the second form run past 20 minutes, which reverts her to the first form and hands you a fresh full-health second phase to fight all over again.

Notable Kalphite Queen drops & rates

Dragon 2h sword drop Dragon 2h sword 1/256 · unique
Jar of sand drop Jar of sand 1/2,000 · tertiary
Kalphite princess drop Kalphite princess 1/3,000 · pet

Drop rates from our drift-checked database; live Grand Exchange values are on the GE Price Tracker.

Kalphite Queen Guide — FAQ

How much HP does the Kalphite Queen have?

Each form has 255 Hitpoints, for a total of 510 Hitpoints across the two phases. Both forms also share a max hit of 31.

What prayers do I need for the Kalphite Queen?

Her first form keeps Protect from Magic and Protect from Missiles active, and the second airborne form keeps Protect from Melee active — but these only improve her Defence, they don't block your damage. For your own protection, pray Protect from Magic throughout, because it's preferred in case another player crashes you (her magic attack bounces between players). Add an offensive prayer like Piety, Rigour, or Augury to speed up kills.

Why do I need two combat styles?

The grounded first form has elevated Magic and Ranged defence, so it is killed most efficiently with melee. The airborne second form has elevated Melee defence, so it is best handled with Ranged (or Magic). Bringing both styles lets you hit each phase where its defence is weakest. You can kill her with one style, but two makes the fight noticeably faster and easier.

What are the Kalphite Queen's best unique drops?

Her standout uniques are the Dragon 2h sword (1/256), the dragon chainbody, the dragon pickaxe and the kq head. She also drops the Jar of sand (1/2000) and the pet Kalphite princess (1/3000). The full table with all rates sits above this guide.

What happens during the phase transition?

When the first form hits zero health, it takes 20 game ticks (12 seconds) for her to shed her exoskeleton and become the airborne second form. Use that window to heal, restore prayer, and switch to your second style. Any stat drains you landed on the first form carry over to the second.

Is the Kalphite Queen good on a Slayer task?

Yes — using a Slayer helmet (i) while on a Kalphite task gives a far greater DPS bonus than any other single piece of gear. If you are finding her difficult, the wiki specifically recommends doing Slayer tasks until you get a Kalphite assignment before attempting her seriously.

Heading

More info failed :(
Possible reasons for this: our item ID is wrong, osrsbox is down or GE Tracker is down. Report this here.
OSRS item details Members Item: Tradeable:
Price: Updated: