

Olm Best in Slot Gear & Strategy Guide
Best Gear vs Olm
auto-updated from live wiki dataYour stats
Defaults to a maxed (99s) main-game account. Edit any stat to match yours.
Best Ranged setup vs Olm
Suggested items
Damage / sec
—
vs Olm
Max hit—
Accuracy—
Time to kill—
Setup value
—
Build options — pick your budget
Open in the DPS calculator →
Best in slot gear for Olm (current meta)
This setup is computed live from the same wiki-sourced combat stats and monster data that power our OSRS DPS calculator — so it tracks the current meta instead of going stale. Pick your combat style above and it ranks every viable weapon and armour piece by damage per second against Olm, factoring in the boss's defences, size and any elemental weakness.
Not at maxed stats? Lower any level on the left and the recommendation re-ranks instantly — requirement-gated gear drops out automatically. For the full ranked list per slot, open the BiS calculator; to pit two specific items against each other, use Gear Compare.
Olm Strategy Guide
Great Olm (CoX) Guide
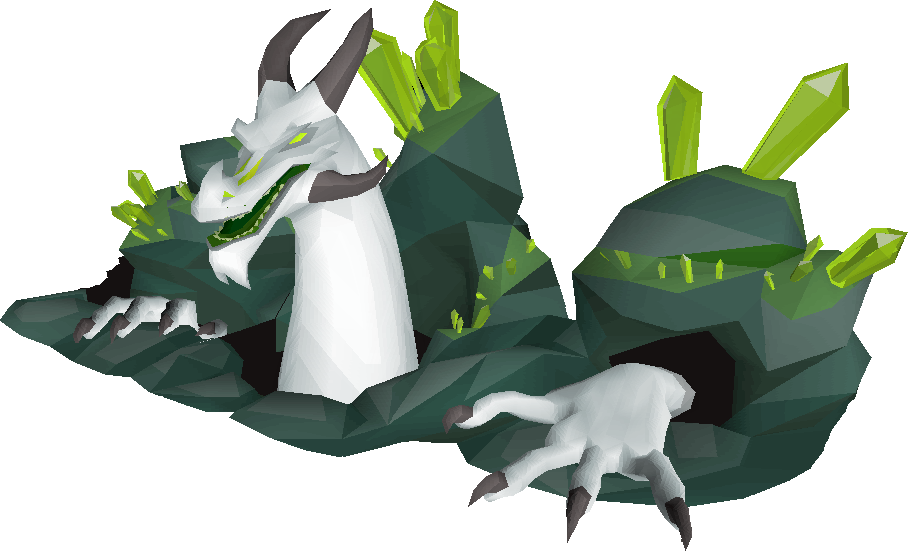
The Great Olm (called the Guardian in the Deep by Xeric's followers) is the final boss of the Chambers of Xeric raid. It is a members-only encounter and, by lore, the creation of a dragonkin named Karuulm. Olm carries a defined combat level of 1043 when scaled for a maxed player — the only monster in the Chambers with a fixed combat level — and its stats scale with the size and strength of your raid team.
Olm is fought as the closing stage of a full Chambers of Xeric run, so you never face it alone in a vacuum: you arrive after clearing the rest of the raid, and once you cross the mystical barrier into its chamber it becomes a fight to the death with no escape. Olm has at least four phases (with an extra phase added for every 8 players in the raid), attacks with both Magic and Ranged, and ends on a frantic final stand. This guide breaks down its left/right hand mechanic, the rotating crystal, lightning and fire specials, and how the encounter closes out.
Requirements & where to fight
The Great Olm lives at the very end of the Chambers of Xeric, the raid located in the caves of Mount Quidamortem. You reach it only after completing the rest of the raid — Olm is the final room, sealed behind a mystical barrier. There is no slayer or quest requirement to fight it, but the encounter is members-only and assumes you can survive a full raid first.
Because Olm's combat stats scale to your team, it behaves very differently solo versus in a group. Scaled for a maxed player, the head has 800 Hitpoints and each hand has 600 — though, like its combat stats, Olm's health scales with the size and strength of your raid. The Wiki notes that in most small teams its combat stats and max hit are comparable to God Wars Dungeon bosses; concretely, the head's max hit on normal mode is 27, rising to 29 by phase 4 (and as high as 41 in Challenge Mode), so treat it as a high-end PvM encounter rather than a casual kill.
Recommended stats & gear
Olm punishes weak combat stats, so come in with your offensive skills as high as you can — strong Ranged, Magic and Attack/Strength, backed by high Hitpoints, ready to swap between protection prayers constantly.
Constant prayer-flicking is core to the fight, so a deep Prayer book matters. The key is matching your style to the part you are hitting, because each part resists everything except its weakness. Olm's right hand (the mage hand) takes 66% reduced damage from all non-magic attacks — so hit it with Magic. The left hand (the melee hand) takes 66% reduced damage from non-melee attacks — so hit it with melee. The head and the rest of Olm are also a dragon, vulnerable to dragonbane weapons, and Olm gained a 50% elemental weakness to earth spells in 2025, which favours an earth-spell magic setup. For the exact best-in-slot loadout for each part, use our Boss Gear Finder above (/boss-gear-finder/?boss=olm), and compare item families on our magic, ranged and melee gear pages rather than guessing.
Inventory & supplies
Olm is a prayer-swap and damage-management fight, so build your inventory around staying alive through long phases. Bring plenty of food and brews, prayer restoration, and an antipoison option — Olm is poisonous, and its acid pools inflict poison starting at 2 damage. A water source is mandatory for one mechanic: any water spell, ice spell, Humidify or a filled watering can can douse a segment of the fire wall, so carry a way to extinguish flames. Keep your magic, ranged and melee switches packed if you intend to hit different hands with their respective weaknesses.
Fight mechanics
Basic attacks — Magic & Ranged. Olm's head fires two basic attacks: a large green magic orb and smaller chunks of crystal as a ranged hit, both dealing the same damage. There is a 1/5 chance the head switches attack style each time it attacks, so watch the projectile and flick the matching protection prayer; prayer reduces this damage by roughly 75–80%.
Spheres. Olm sends a coloured sphere at you. If it lands it deals about 50% of your current Hitpoints and, if you were protecting, disables that prayer and cuts your Prayer by 50%. The correct overhead stops it completely: red (aggression) needs Protect from Melee, green (accuracy/dexterity) needs Protect from Missiles, and purple (magical power) needs Protect from Magic.
Crystal attacks. Falling Crystals target a player with a red aura, dropping 11 spiked crystals for up to 15–20 damage on the targeted tile — move off it. Crystal Bombs are deployed (up to three; two for smaller groups) and explode after several seconds over a four-tile radius, hitting for at least 15 and up to far more the closer you stand — run clear before detonation.
Flame attacks. Deep Burn marks a player who yells "Burn with me!", taking 5 damage every few ticks and dropping stats for six hits, and it can spread to nearby teammates — spread out. The Fire Wall traps a player between two walls; standing in the gap deals 50–65 damage over 5 seconds, so douse a segment with water or escape immediately.
Acid attacks. Acid Spray scatters pools that deal 3–6 damage per tick and poison you if you stand in them; Acid Drip coats a player so they leave pools underneath, so keep moving onto clean tiles.
Special attacks (non-head phases). On set timings the left hand telegraphs three specials: Crystal Burst (a crystal seedling under each player bursts and shoves you for heavy damage if you stay on it — move off), Lightning (bolts run north/south of the chamber, disabling overhead prayers, dealing damage and binding you if hit — dodge the lit lanes), and Swap/Teleport (a teleport that hits harder the further you are from the target tile).
The left/right hand mechanic. To end each phase you must disable both hands. The right (mage) hand only takes real damage from Magic; the left (melee) hand only from melee. The left hand clenches when it takes a heavy hit (at least 1/20 of its base health). Once both hands are down, Olm retreats underground, showers the room with falling crystals, and re-emerges on the other side with a new power. The head can be attacked any time but heals back any damage in every phase except the final one.
Penultimate & final phases. In the penultimate phase Olm's head glows, all powers are available, and the left hand gains a damage-to-health ability (shown by an infinity symbol) that heals it when hit — here both hands must be disabled within a time window or Olm fully recovers. In the final standard phase Olm makes its last stand on the spot: crystals keep falling continuously, all powers stay available, and Life Siphon shields tiles then damages anyone off them, healing Olm for five times the damage dealt. The head finally stops auto-healing, so this is where it dies.
Strategy & kill rotation
Treat Olm as a rhythm fight layered on top of the rest of the raid. Through the early phases, lock onto the correct hand for your style — magic on the right hand, melee on the left — while flicking overhead prayers against the head's alternating Magic and Ranged basics and the coloured spheres. React to each telegraphed special as it lands: step off crystal seedlings, dodge lightning lanes, spread on Deep Burn, and douse or flee the fire wall.
Aim to bring both hands down close together so neither recovers, then reposition for the falling-crystal transition. In the penultimate phase the timer on the hands is tight and every power is in play, so commit hard to disabling both within the window. On the final phase the head no longer heals — survive the constant crystals and Life Siphon, keep damage on the head, and finish the kill. Because Olm scales to your team, a coordinated group splits the hands and prayers; solo, you manage everything yourself, which is why solo Olm is a benchmark of PvM skill.
Notable drops
Killing the Great Olm completes the Chambers of Xeric raid and is what unlocks the run's loot. The Wiki frames this through the raid's lore: after Xeric defeated Olm he sealed away the weapons and armour his party developed in the caves — what the page links to as the Ancient chest unique drop table. The Great Olm page itself does not list specific item drops or rates; rewards are rolled from the raid's reward chest rather than dropped by Olm on the floor.
Common mistakes
Hitting the wrong hand with the wrong style. Each hand has 66% damage reduction against everything except its weakness — magic on the mage (right) hand, melee on the melee (left) hand — so mismatching your style wastes most of your damage.
Ignoring sphere colours. A sphere not blocked with the matching overhead can hit for about half your current HP and strip your prayer, so always read the colour and flick the right protection prayer.
No water for the fire wall. Without a water spell, ice spell, Humidify or filled watering can, you cannot douse the flames and risk 50–65 damage in the trap.
Letting the penultimate hands recover. In that phase both hands must drop inside the time window, and the left hand heals when hit via its infinity ability — staggering the hands lets Olm reset to full.
Olm Guide — FAQ
What is the Great Olm and where do you fight it?
It is the final boss of the Chambers of Xeric raid, fought in the last room behind a mystical barrier after you clear the rest of the raid. Xeric's followers call it the Guardian in the Deep, and it is the only Chambers monster with a defined combat level (1043 scaled for a maxed player).
How do you damage Olm's hands?
Match your style to the hand. The right hand (mage hand) takes 66% reduced damage from everything except Magic, and the left hand (melee hand) takes 66% reduced damage from everything except melee. Both hands must be disabled to push Olm to the next phase.
How do the coloured spheres work?
Olm fires a red, green or purple sphere that deals roughly 50% of your current Hitpoints and disables your prayer if it lands. Block it with the matching overhead: Protect from Melee for red, Protect from Missiles for green, and Protect from Magic for purple.
Why doesn't the head die in earlier phases?
In every phase except the final one, Olm automatically heals any damage dealt to its head shortly after. The head only stays dead in the final standard phase, where it no longer auto-heals — that is when you can actually finish the kill.
Heading
Possible reasons for this: our item ID is wrong, osrsbox is down or GE Tracker is down. Report this here.

