Skotizo Best in Slot Gear & Strategy Guide

Skotizo Strategy Guide

Requirements - 1 x Dark Totem

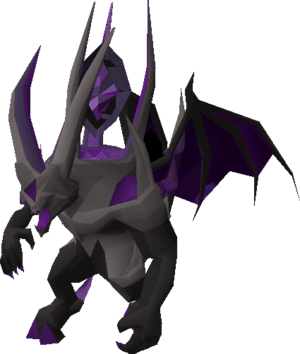
Skotizo is a solo demi-boss which you can fight beneath the Catacombs of Kourend. In order to access Skotizo, you must sacrifice a complete Dark Totem, which you can assemble from three different totem pieces dropped by all monsters through the Catacombs. It can take a while to obtain all three pieces, therefore it’s not possible to ‘farm’ Skotizo in the same manner as some other solo bosses like Zulrah or Vorkath – he does, however, have some very good drops and he’s the only boss in the game to have a 100% drop rate for Clue Scrolls.

Notable Drops
Uncut Onyx - OSRS item icon
Jar Of Darkness - OSRS item icon
Ancient Shard - OSRS item icon
Clue Scroll (hard) - OSRS item icon

Skotizo - Arclight Melee Guide

The general strategy at Skotizo is just to gear for maximum DPS while finding a good balance of melee and magic defence. Skotizo will mostly use melee attacks while you are within melee distance but will sometimes use magic attacks. For this reason, you should pray melee when you’re within melee distance.

Skotizo will periodically activate the Awakened Altars found in the North, South, East and West of the room. For each Altar which is ‘active’, Skotizo will have increased defence. Maxed players might be able to leave all 4 Awakened Altars active and still be able to hit through Skotizo’s defence but if you do not have 90+ stats it is recommended to allow no more than two Altars to be active at one time.

When you’re running around the room to attack the Altar’s, you should switch your prayer to protect from magic to avoid taking damage from Skotizo’s magic attacks.

Skotizo Video Guide

Recommended Setup

Setup Bonuses

Equipment bonuses for this recommended setup.

Attack bonus

Stab: 0 Slash: 0 Crush: 0 Magic: 0 Ranged: 0

Defence bonus

Stab: 0 Slash: 0 Crush: 0 Magic: 0 Ranged: 0

Other bonuses

Melee strength: 0 Ranged strength: 0 Magic damage: 0 Prayer: 0

Inventory

View your recomended inventory below.

Dragon warhammer - OSRS item icon
Super restore(4) - OSRS item icon
Stamina potion(4) - OSRS item icon
Super combat potion(4) - OSRS item icon
Anglerfish - OSRS item icon
Teleport to house (tablet) - OSRS item icon

Equipment / Inventory Notes:  

You can switch the Dragon Warhammer out for your favourite special attack weapon.

Skotizo Guide

Skotizo is a demonic boss located beneath the Catacombs of Kourend. He is a level 321 demon with 450 Hitpoints and a maximum hit of 38, released on 16 June 2016 as "Skotizo - The Archaic Demon". Unlike most bosses you can simply walk up to, Skotizo is a sporadic boss: accessing his lair requires using a dark totem on the altar in the centre of the Catacombs, and one dark totem permits only a single attempt.

He is primarily known for his guaranteed hard clue scroll drops, along with a very high chance of elite clue scrolls and a steady supply of ancient shards. Because he counts as both a black demon and a greater demon, he can be substituted in for those Slayer tasks, and his lair counts as part of the Catacombs for Konar's location-specific assignments. This guide covers his entry mechanic, the awakened-altar gimmick that defines the fight, demonbane weapons, and how to bring him down efficiently.

Overview — what and where

Skotizo dwells in his own arena underneath the Catacombs of Kourend. He was once a general of Zamorak during the God Wars, though he was often outshined by Zamorak's more notable generals such as Thammaron and K'ril Tsutsaroth, and is lore-wise the brother of Zalcano. After being assigned to recover an artefact from the Karamjan Temple, he betrayed his own squad to claim the artefact's power for himself, decimating his expedition team. He then fled west, discovered Great Kourend, and used the artefact's power to call creatures to his side and set himself up in Kourend's underground — the present-day Catacombs of Kourend.

Mechanically he is a level 321 demon with the demon attribute, which is what makes him vulnerable to demonbane weapons — the single most important fact for gearing this fight. He has 450 Hitpoints, hits a maximum of 38, and attacks with both Stab (melee) and Magic. He is aggressive but not poisonous, and is fully immune to poison and venom (100% resistance to both). Killing him on a Slayer task awards 618.5 Slayer experience. He cannot be damaged with a ring of recoil, so reflect strategies do not work here.

Requirements & where to fight

Skotizo has no quest requirement. The only hard requirements are:

  • Access to the Catacombs of Kourend.
  • An assembled dark totem, built from a dark totem base, middle and top — pieces dropped by monsters within the Catacombs. One assembled totem grants exactly one attempt.

His arena requires sacrificing the dark totem to the Altar in the centre of the Catacombs to enter. The quickest way to reach the entrance is to enter the Catacombs through the Statue of King Rada I in the Kourend Castle courtyard, reachable with a Xeric's talisman via the 'Xeric's heart' option. After completing Client of Kourend, the Kourend Castle Teleport can also be used. Suggested combat levels from the Wiki are 75+ Attack (to wield Arclight), plus 75+ Strength, Defence, Hitpoints and Magic.

Recommended stats & gear

Skotizo is a demon, so the meta is built around demonbane weapons. His infobox also lists a 40% elemental weakness to Water spells (a Water spell such as Water Surge would exploit it), but magic is off-meta here — demonbane melee or ranged dominates because only Arclight/Emberlight one-hit the altars, so treat the Water weakness as trivia rather than a gearing cue. There are two viable approaches depending on your bank:

  • Demonbane meleeArclight or its upgrade Emberlight are the standout weapons. They shred demons and, crucially, one-hit the awakened altars (covered below). Pair them with a strong melee setup and a power ring such as the Ultor ring family.
  • Ranged — for most players the best method available is to use ranged. A scorching bow is a much better choice than plain melee; a twisted bow is also highly effective and lets you fight at distance to take no damage. Ranging is recommended over melee if you do not own Emberlight.

One useful trick the Wiki highlights: armour with high Magic Defence (such as black dragonhide) lets you tank purely his magic while protecting from melee, which matters because his magic attack is accurate. In fact, the Wiki notes that using a body-slot item that boosts Magic Defence instead of pure Strength bonus can be worthwhile when protecting from melee, precisely because of that accurate magic attack — a small loadout tweak that meaningfully cuts the chip damage you take. Pures and players who simply want to take no melee damage can fall back on other ranged weapons, which are less effective than Arclight/Emberlight but perfectly serviceable.

Rather than chase an exact item list here, set your real combat level and budget in our Boss Gear Finder above for a tuned loadout that fits your bank. Reaching 75 Attack to wield Arclight is the single biggest gear unlock for this boss — see our Attack guide if you are short. Whichever style you pick, the universal rule is that one demonbane weapon (Arclight or Emberlight) belongs in your inventory no matter what, because nothing else clears the altars cleanly.

Inventory & supplies

The Wiki's recommended inventory is built around sustain and the altar mechanic:

  • A Divine super combat potion (melee) or Divine bastion potion (ranged), or a standard super set.
  • A special-attack weapon, optionally with gear to boost its effectiveness.
  • Arclight or Emberlight on hand specifically to destroy altars (if your main weapon is a bow).
  • 2-3 Prayer potions.
  • A stamina potion — optional, but recommended, especially when using Arclight since more altars will be activated and you will run more.
  • An emergency teleport (e.g. a house teleport tablet).
  • Your dark totem to enter, plus a Xeric's talisman or other transport.
  • The rest of the inventory should be sharks or better.

Keeping your Prayer topped up is essential because you will be praying for most of the fight.

Fight mechanics

Skotizo has a small set of attacks and one defining gimmick. Handle each part as follows:

  • Melee (Stab) attack — used at close range. If you stand next to him with a melee weapon, this is his main source of damage; pray Protect from Melee to negate it.
  • Magic attack — accurate and used from any range, including while you are away disabling altars. His maximum hit overall is 38. This is the attack that still gets through if you protect from melee, which is why high Magic Defence armour helps.
  • Awakened Altars — at any time Skotizo randomly activates one of the four Awakened Altars on each side of the room. For each active altar you deal less damage to him: 15% less with Arclight/Emberlight and 25% less with other weapons, stacking up to a maximum of 60% reduction with Arclight/Emberlight or a full 100% with other weapons. You must run to and disable them. Importantly, only Arclight and Emberlight disable an altar in one hit regardless of stats — Silverlight and Darklight do not, and neither do the Arceuus demonbane spells or the scorching bow. If the altars stay simultaneously active for an uninterrupted 3 minutes, they stop respawning for the rest of the fight once disabled.
  • Summoned minions — after two-thirds of his health is depleted he summons three reanimated demon spawns, and he may randomly summon a dark ankou while an altar is active. Neither poses a threat if you are using Protect from Melee, and fighting them gives no benefit. If you do kill the spawns, Skotizo can simply summon them again, so attacking them is pure wasted time — your damage is always better spent on Skotizo himself or on clearing altars.

Putting the pieces together, the fight is a damage race against your own DPS loss: Skotizo's own attacks are easily prayed off, but every altar you let linger is a slice of damage you are not dealing. The skill in the fight is not survival — it is keeping the altars cleared so your demonbane weapon is always hitting at full power.

Prayer & protection by gear level

There is no single "correct" prayer — it depends on your gear, and the Wiki gives two setups:

  • Lower gear (no oathplate / Torva) — wear armour with high Magic Defence (e.g. black dragonhide) and use Protect from Melee, so his only damage source is the magic attack. This is the simpler, safer setup.
  • Better gear — it is slightly more efficient to use strictly melee gear with Protect from Magic, stepping outside melee range when you are not attacking so he cannot hit you with melee either.
  • While running to disable altars — temporarily switch to Protect from Magic, because Skotizo does not approach to use melee when you are away from him; his magic is the only thing that reaches you.

Strategy & kill rotation

The core loop is simple: damage Skotizo, disable altars the moment they activate, repeat.

  • Enter by sacrificing your dark totem at the central Altar. Activate your combat potion and the correct protection prayer for your gear.
  • Attack Skotizo with your main weapon — a demonbane Arclight/Emberlight in melee, or a scorching bow / twisted bow from range.
  • As soon as an Awakened Altar lights up, switch to Protect from Magic and run to it. Hit it with Arclight or Emberlight for a guaranteed one-hit disable. Letting altars stack is the biggest avoidable DPS loss — at full stack, non-demonbane weapons do zero damage. Stamina potions keep you moving between them. (A toxic blowpipe is an effective alternative for disabling altars if you choose not to carry Arclight.)
  • Use your special-attack weapon for burst. Defence-reduction specials — dragon warhammer, elder maul or Bandos godsword — are especially valuable without best-in-slot gear, while burning claws or the Voidwaker deal high direct damage. If you bring the elder maul or dragon warhammer, consider gear that boosts crush accuracy for the spec.
  • After two-thirds of his HP is gone he summons minions — ignore them under Protect from Melee and keep focusing Skotizo and the altars.
  • Eat sharks as needed and keep Prayer topped with potions until he dies.

A subtle timing detail worth exploiting: if all four altars are left simultaneously active for an uninterrupted 3 minutes, they stop respawning for the rest of the fight once you disable them. With strong enough DPS you will usually kill Skotizo before that ever matters, but on a slower kill it is a genuine relief — clear the last wave and they stay down. There is also a synergy worth knowing: if you wear an amulet of blood fury, its passive heal can trigger while you are disabling altars, restoring 30 Hitpoints per proc when using Arclight. Because using Arclight to clear altars activates more of them over a kill, carrying that stamina potion is not optional in practice — you will be running between altars repeatedly, and running out of energy is what turns a clean kill into a sloppy one.

Notable drops

The render engine draws the full drop table above. The headline reason players farm Skotizo is clue scrolls: the main page states he gives a guaranteed hard clue scroll every kill, along with a very high chance of elite clue scrolls. He also drops ancient shards on every kill (averaging 1.41 per kill).

His marquee uniques are the Dark claw (used to upgrade Arclight into Emberlight) at 1/25, his pet Skotos at 1/65, and the collection-log curio Jar of darkness at 1/200. He is also the only monster to directly drop the shield left half, which makes him a small footnote in many collection logs.

The Dark claw deserves a special mention because it is part of why Skotizo is self-reinforcing as a target: the claw upgrades your Arclight into Emberlight, and Emberlight is the best demonbane weapon for this exact fight — so farming Skotizo with Arclight can hand you the item that makes future Skotizo kills faster. Combined with the guaranteed hard clue every kill and the high elite-clue chance, the kill is valuable even on the trips where no big unique lands. He also drops infernal ashes on every kill (an upgrade he received in the A Kingdom Divided update, replacing regular ashes), which feed Prayer training nicely if you are building toward better gear for harder bosses.

Common mistakes

  • Ignoring the altars. Every active altar cuts your damage, and at full stack non-demonbane weapons do nothing. Disable them the instant they appear.
  • Trying to disable altars with the wrong weapon. Only Arclight and Emberlight one-shot an altar. Silverlight, Darklight, demonbane spells and the scorching bow do not — bring an Arclight/Emberlight even on a ranged setup.
  • Forgetting to swap prayers when running. Skotizo keeps hitting you with magic while you are away from him, so switch to Protect from Magic before you run, not after you take a hit.
  • Wasting time on minions. The reanimated demon spawns and dark ankou give no benefit and are harmless under Protect from Melee — leave them.
  • Bringing too few totems for the trip. One dark totem is one attempt only; he is a sporadic boss, so stock totems before committing to a session.

Notable Skotizo drops & rates

Dark claw drop Dark claw 1/25 · unique
Jar of darkness drop Jar of darkness 1/200 · tertiary
Skotos drop Skotos 1/65 · pet

Drop rates from our drift-checked database; live Grand Exchange values are on the GE Price Tracker.

Skotizo Guide — FAQ

Do I need a quest to fight Skotizo?

No. There is no quest requirement. You only need access to the Catacombs of Kourend and an assembled dark totem, which you sacrifice on the central Altar to enter his lair.

What weapon should I use against Skotizo?

Skotizo is a demon, so demonbane weapons are best. Arclight or Emberlight are the top melee choices and are the only weapons that one-hit the awakened altars. For most players ranged is the best method available — a scorching bow beats plain melee, and a twisted bow works well at distance. Set your stats in our Boss Gear Finder for a tuned loadout.

What are the awakened altars and how do I deal with them?

At any time Skotizo activates one of four Awakened Altars in the room. Each active altar reduces your damage — 15% with Arclight/Emberlight, 25% with other weapons, up to a 60% / 100% maximum. Run to each one and disable it; only Arclight and Emberlight disable an altar in a single hit. If they stay active together for 3 uninterrupted minutes, they stop respawning once disabled.

Which prayer should I use?

It depends on your gear. With lower gear, wear high Magic Defence armour and use Protect from Melee so only his magic gets through. With better gear, use melee gear with Protect from Magic and step out of melee range when not attacking. Either way, switch to Protect from Magic while running to disable altars.

Why is Skotizo worth killing?

He drops a guaranteed hard clue scroll every kill plus a very high chance of elite clues, along with ancient shards on every kill. His uniques include the Dark claw (1/25, used to make Emberlight), the Skotos pet (1/65) and the Jar of darkness (1/200). Because he counts as a black and greater demon, he can also clear those Slayer tasks.

Can Skotizo be used as a Slayer task?

Yes. He can be substituted for both black demon and greater demon tasks, and his lair counts as part of the Catacombs of Kourend for Konar's location-specific assignments. Killing him on task gives 618.5 Slayer experience.

Heading

More info failed :(
Possible reasons for this: our item ID is wrong, osrsbox is down or GE Tracker is down. Report this here.
OSRS item details Members Item: Tradeable:
Price: Updated: